Introduction

If you notice your climate control lights are out but the controls are still working, use this guide to replace the lights. The light bulbs used in the climate control buttons are HVAC bulbs and over time they will eventually go out and make it difficult to see the controls at night. In this guide I will show you how to replace them on a 2004-2005 7th generation Honda Civic. It is a relatively easy repair but it does take a while so have some time on hand.

Before you purchase the replacement bulbs, ensure they are compatible with your vehicle's voltage (typically 12V). LED bulbs are energy-efficient and longer-lasting, while halogen bulbs offer a more traditional look.

Before you begin the repair make sure your car is off.

Note: This guide applies only to 2004–2005 models. The 2001–2003 Honda Civic is slightly different so the procedure is not the same.

  1. Ihfph1iGMDWYJWI5
    Ihfph1iGMDWYJWI5
    fHdfEUONEyciQeiT
    • Pull down on the silver collar to unlatch the shift boot.

  2. UPSVjBrk2vMc4UVP
    UPSVjBrk2vMc4UVP
    EPj6YUJFZG1PWoMN
    • Unscrew the shifter knob and remove it.

  3. PUBUTcQvoBGMbnrs
    PUBUTcQvoBGMbnrs
    f5WZwNrBIoEHWjBH
    • Lift the edge of the shifter boot and pull up the shifter housing.

    • It may take a bit of force.

  4. HNN1WbLHAIcmaDEV
    HNN1WbLHAIcmaDEV
    hsVlUUgGV4ydWxFD
    SIWrCj2G1lsMjBU6
    • Use a Phillips #1 screwdriver to remove the two 17 mm black screws near the cup holder.

  5. omOqHw4G23muhrFL
    omOqHw4G23muhrFL
    YsUfsvYrGFtjsSKZ
    qVkXFusogD26kOWO
    • Pull along the sides of the center console to release the clips.

    • Metal clips might fall, you can attach them when reassembling the center console.

  6. XiIPYEOaRYhfTik5
    XiIPYEOaRYhfTik5
    Sxe6VRTkfgv3ZtFe
    • Unplug the cigarette port connector.

    • If you have aftermarket parts those will also need to be unplugged but remember where the connections belong to.

  7. UVIWXf6QDPFQB5sZ
    UVIWXf6QDPFQB5sZ
    RfsSeQ5gQs51Rs3Q
    KIBFH2LnAfrxsARl
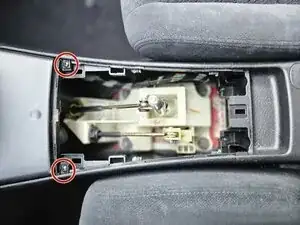
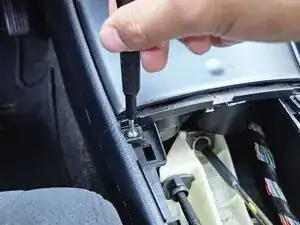
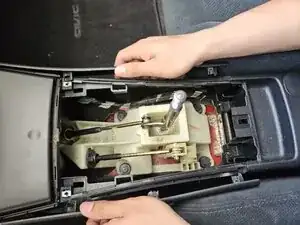
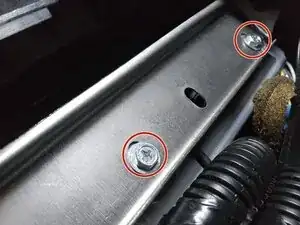
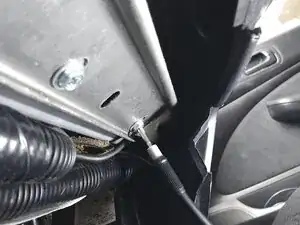
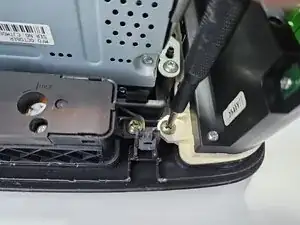
    • Use an 8 mm socket wrench or Phillips #2 screwdriver to remove two 8 mm screws from inside the center console and under the radio section.

  8. m41PHuNrqYwOL3HK
    m41PHuNrqYwOL3HK
    oLC1vX5PLFbZUoeY
    GsZTeteSXpMEPsBn
    • Use a trim removal tool to release the clips surrounding the head unit (radio housing).

  9. bHkLbS2mK1JvVxbB
    bHkLbS2mK1JvVxbB
    61w4cj3V3MSSfXaU
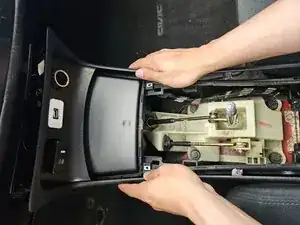
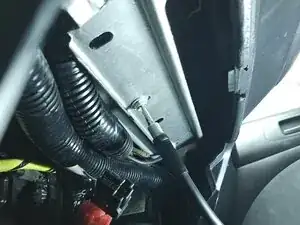
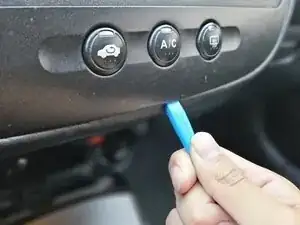
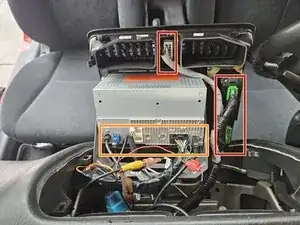
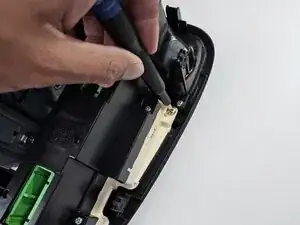
    • Open the radio unit from the top to reveal the cables behind it.

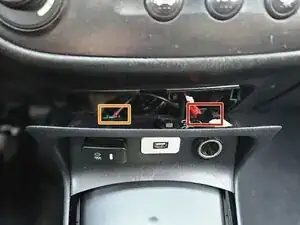
    • Unplug each connector from the head unit.

    • Unplug any connectors to aftermarket parts if needed.

    • For helpful details on different types of connectors, take a look at this Recognizing and Disconnecting Cable Connectors guide. 

    • If you have an aftermarket radio note where all connections belong.

  10. Jar2NNR3VqscAbMk
    Jar2NNR3VqscAbMk
    QCLVjBcZPx3wBKkB
    ZhdOnRIiIWLD1tSs
    • Pull straight up on the climate control knobs to remove them.

    • Each knob is uniquely shaped for its control, so it will only fit its original location.

  11. kAXbAFd6fopEgAJs
    kAXbAFd6fopEgAJs
    vjqhtQOA2nEVlQai
    GJ6ADpXG5hQiJkAJ
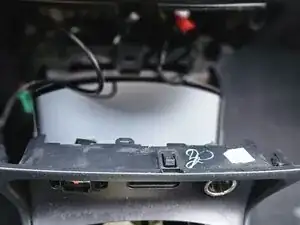
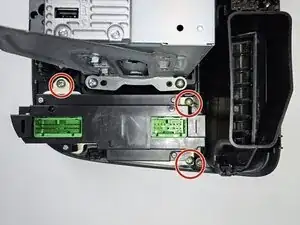
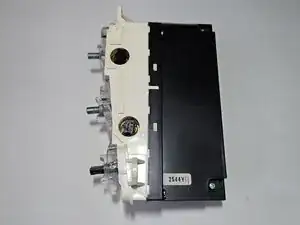
    • Use a Phillips #2 screwdriver to remove three 17 mm screws securing the climate control module to the head unit.

    • Remove the climate control module.

  12. waeE6ye1WXL1mjoe
    waeE6ye1WXL1mjoe
    yVQTgItKieseEZOP
    fxecOOwNG1OlBCOV
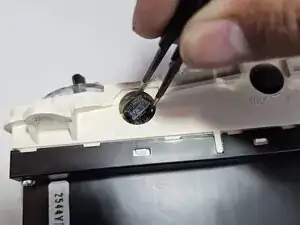
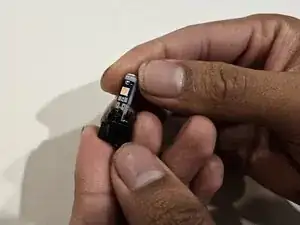
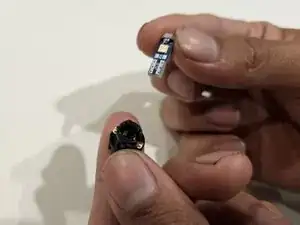
    • Use tweezers or your fingers to twist and remove the two light bulbs from the side of the climate control module.

  13. aVDYJQWCXlNYJhPY
    aVDYJQWCXlNYJhPY
    R4gReXlMXp5TUI1K
    • Pull out the bulbs from the housing.

    • Replace old light with new light.

    • Halogen bulbs and LED bulbs use different housing but the process is the same.

Conclusion

To reassemble your device, follow these instructions in reverse order.

Emmanuel Sanchez

Member since: 04/03/25

217 Reputation

0 comments