Introduction
This guide shows how to replace the spark plugs in your 2018-2024 Toyota Camry equipped with the 2.5L 4-cylinder engine.
The spark plugs provide the means for an electrical spark to ignite the fuel-air mixture in your engine. Because they are precisely matched to your engine, using the correct plugs (with the correct overall size and "gap") is important for proper operation.
Failing, fouled, or incorrectly-gapped spark plugs can cause misfiring, increased emissions, poor fuel economy, and ignition‑related trouble codes.
Note: The engine should be warmed up fully, and then allowed to cool down for 1-2 hours before performing this replacement.
-
-
Check the owner’s manual to confirm the correct mileage or time interval for spark plug service.
-
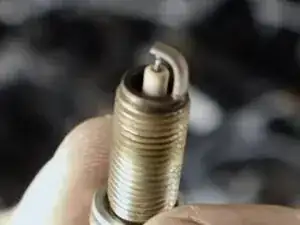
Obtain four genuine Toyota iridium spark plugs and verify the factory identification mark on each tip.
-
Gather a 14 mm spark plug socket with a rubber insert, an 8 mm socket, a ratchet, and a torque wrench that reads 15 ft‑lbs and 66 in‑lbs.
-
-
-
Press the release tabs and unplug the four ignition‑coil connectors.
-
Remove the four 8 mm bolts that secure the coils to the plastic valve cover.
-
Lift each coil straight up, ensuring the rubber weather seal comes out with the coil.
-
-
-
Use a 14 mm extra deep spark plug socket with a ratchet on the first plug and loosen it, then repeat for the remaining three plugs.
-
Use the socket’s rubber insert to lift each plug out of the well without damaging the electrode.
-
-
-
Thread each new plug by hand until fully seated to prevent cross‑threading.
-
Torque each spark plug to 15 ft‑lbs with a calibrated torque wrench.
-
-
-
Push each coil onto its plug, confirming the rubber weather seal is present and seated.
-
Reconnect the coil connectors, following the gray‑black‑gray‑black order on the harness.
-
-
-
Align the oil‑fill opening in the cover with the filler neck.
-
Wiggle the cover until the tabs align with their mounts, then press down until all three clips snap into place.
-
Start the engine and confirm a smooth idle with no warning lights. Listen for misfires, then ensure the engine cover is secure. Record the mileage of the service for future reference.
Repair didn't go as planned? Ask our Answers Community for help