
Inleiding
Gebruik deze handleiding om een gebarsten, kapot of niet goed werkend scherm van je Apple Watch Series 6 te vervangen.
Deze handleiding laat je zien hoe je het scherm verwijdert van de cellulaire/LTE-versie van de Apple Watch. De procedure voor de standaard GPS-only versie is echter hetzelfde.
Je zult vervangende kleefstrips nodig hebben om sommige onderdelen weer te bevestigen bij het weer in elkaar zetten van je toestel.
-
-
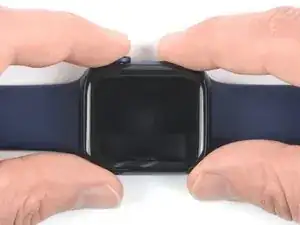
Omdat de opening tussen het scherm en de body van het horloge zo klein is, heb je een scherp mes nodig om de twee van elkaar te kunnen scheiden. Lees de volgende waarschuwingen eerst grondig door voordat je verder gaat.
-
-
-
Verwarm een iOpener (of gebruik een föhn of warmtepistool) en verwarm het scherm van het horloge om de lijm eronder te verzwakken.
-
Laat je iOpenere gedurende minimaal twee minuten op het scherm liggen om het scherm en de lijm eronder volledig te verwarmen.
-
-
-
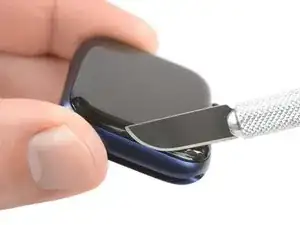
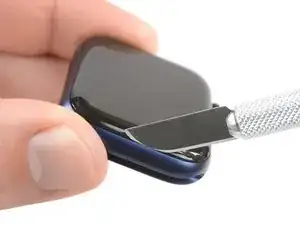
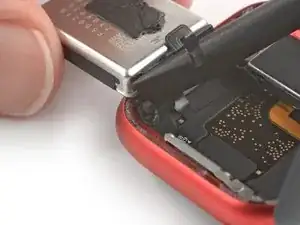
Plaats de scherpe kant van een mes in de dunnen opening tussen het scherm en de behuizing. Begin bij de korte zijde van het scherm, die het verst verwijderd is van de digitale kroon.
-
Druk je mes recht naar beneden in de opening.
-
Als je mes eenmaal in de opening zit, kantel je deze lichtjes om het scherm te openen.
-
-
-
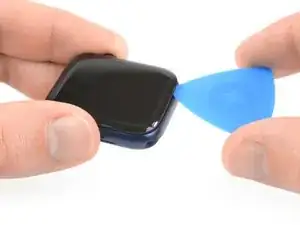
Steek een openingsplectrum in de zojuist door jou gecreëerde opening.
-
Schuif je plectrum langs de korte zijde van het horloge om de lijm aldaar door te snijden.
-
-
-
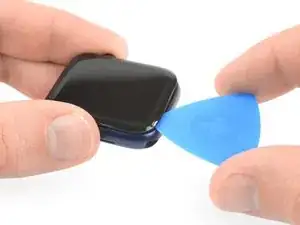
Schuif je openingsplectrum langs de hoek en de lange zijde tegenover de digitale kroon om de lijm onder het scherm door te snijden.
-
-
-
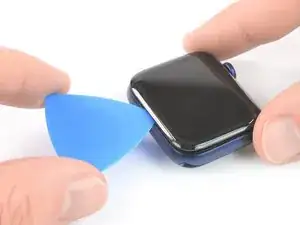
Schuif je openingsplectrum langs de hoek om de laatste stukken lijm aan de korte zijde van het horloge, naast de kroon, door te snijden.
-
-
-
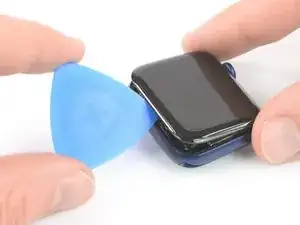
Plaats het horloge op een vlakke ondergrond en gebruik een openingsplectrum om de laatste stukken lijm los te snijden.
-
Schuif een openingsplectrum, tegenover de kant van de digitale kroon, onder het scherm.
-
Kantel je plectrum lichtjes om om het scherm van de behuizing af te duwen.
-
-
-
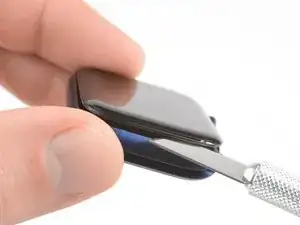
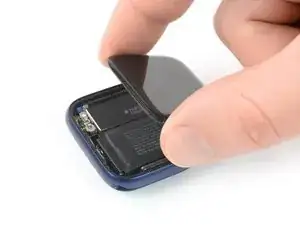
Til het scherm voorzichtig op en trek deze in de richting van de digitale kroon.
-
Vouw het scherm open totdat het scherm recht omhoog staat.
-
-
-
Verwarm een iOpener (of gebruik een föhn of warmtepistool) en verwarm de achterkant van het horloge gedurende minstens twee minuten om de lijm onder de batterij te verzwakken.
-
-
-
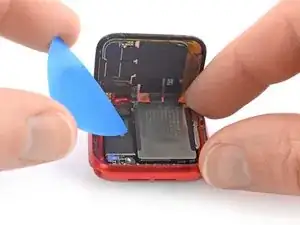
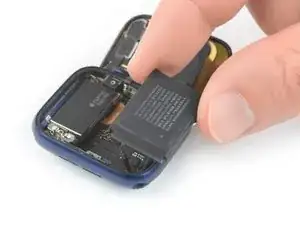
Steek een openingsplectrum tussen de batterij en de trilmotor.
-
Gebruik een stevige en constante druk op je plectrum om de batterij langzaam maar zeker omhoog en los te wrikken. Neem je tijd om de batterij los te krijgen van de lijm op het main bord.
-
-
-
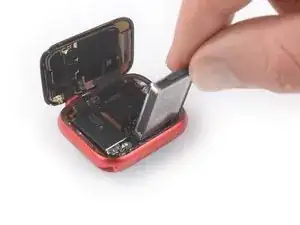
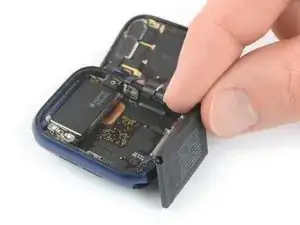
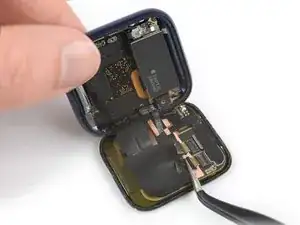
Til de batterij op voorzichtige wijze uit de inkeping in het horloge en plaats deze buiten het horloge.
-
-
-
Gebruik het platte einde van je spudger om de batterijaansluiting omhoog te duwen en los te koppelen.
-
-
-
Steek een openingsplectrum tussen de batterij en de trilmotor.
-
Gebruik een stevige, constante kracht om de batterij langzaam maar zeker omhoog te wrikken, los van de lijm die het aan het mainbord bevestigt.
-
-
-
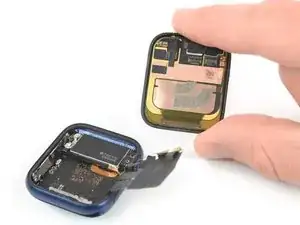
Til de batterij voorzichtig uit de inkeping in de behuizing en plaats deze buiten het horloge, tegenover de trilmotor.
-
-
-
Gebruik het platte einde van je spudge rom de batterijaansluiting omhoog te duwen en los te koppelen.
-
-
-
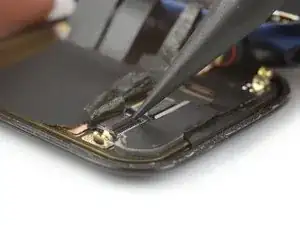
Gebruik de punt van je spudger om de sluitklemmen op beide ZIF-aansluitingen van de schermkabels open te klappen.
-
-
-
Gebruik een pincet om de zijkanten van de sticker, die de scherm- en aardingskabels aan de achterzijde van het scherm bevestigt, omhoog en los te peuteren.
-


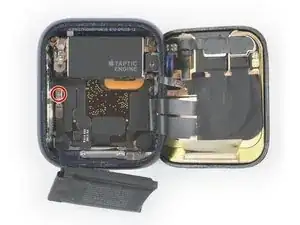


Om je Apple Watch Series 6 weer in elkaar te zetten, volg je deze instructies in omgekeerde volgorde.
Dien een beetje hooggeconcentreerde isopropyl alcohol (>90%) toe op een wattenstaafje of een stofvrij stuk doek om de lijmresten aan alle kanten van de behuizing en in het scherm te verwijderen voordat je de nieuwe kleefstrips aanbrengt.
Breng je e-afval naar een door R2 of e-Stewards gecertificeerde recycler.
Ging je reparatie niet zoals gepland? Bezoek dan onze pagina over probleemoplossing of stel je vraag op ons antwoordenforum voor hulp bij het oplossen van je probleem.

24 commentaren
Can anyone tell me what that 3rd cable is (circled red in the pic linked below)? It’s linked to the metal back in the phone?
I think it is just a grounding wire.
Did you ever find out what that third wire is?
I want to know too, I break it while pulling the battery yesterday, but the watch seems working fine
Coco -
It’s a shield (grounding) line to control EMI noise
Dan -
Siete magnifici
Dommage qu’il n’y ai pas de lien d’une batterie à acheter ainsi qu’un lien pour trouver le joint d’étanchéité.
If you change the battery of the 44 mm Model, make sure you got the Y000 bit for the tiny screw. I have a pretty comprehensive bit set from iFixit, but that one was not included.
AD161 -