Inleiding

If your HyperX CloudX Stinger Core 4P5J9AA headset has no sound or is distorted, the speakers may need replacement. This guide will show you how to access and replace the speakers by opening the ear cups. Some models may require soldering, so use caution and the proper tools during the process. Before beginning, make sure your device is unplugged and you have the new speakers in hand.

  1. CVclxdf5pwjACFmS
    CVclxdf5pwjACFmS
    3SfrEmmEFOYxY6GU
    • Starting with the right ear pad, place one finger on the outside of the ear pad and another finger on the inside.

    • Still gripping the ear pad, gently pull the ear pad away from the headset.

    • You will start to see the green flap leaving the groove of the headset.

    • Pull until the ear pad is fully detached.

  2. SZGIpZNpinMBLTJr
    SZGIpZNpinMBLTJr
    WyuIadQRmYcPa3Xk
    • Repeat Step 1 on the left side.

  3. syI5AyITeEv4Txu6
    • Use a Phillips #00 screwdriver to remove the four 8.0 mm screws securing the speaker plate to the ear cup.

  4. 1gnwMtupiBMlgbGC
    • Open the cap of the speaker plate to see where the wires are connected.

  5. yG1ufSCXBRRxeafU
    • Gently remove the speaker with a spudger.

    • You may need to use a heat gun to loosen the glue.

  6. 2byVXZlWL3rIche4
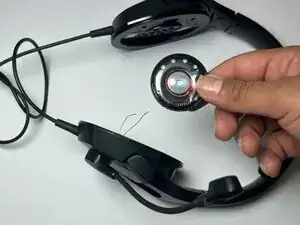
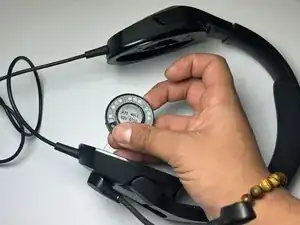
    • Lift the speaker out of the headphones.

  7. SQBn4raVpxSaSYGc
    • Use a soldering iron to desolder the wires from the speaker.

    • Reconnect the wires to the new speaker by soldering them into place. Ensure that the polarity is correct (red=positive, black=ground).

Conclusie

To reassemble your device, follow these instructions in reverse order.
Andy Guerra

Lid sinds: 20/02/25

171 Reputatie

0 commentaren