Inleiding

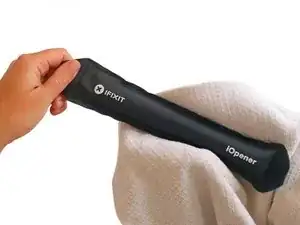
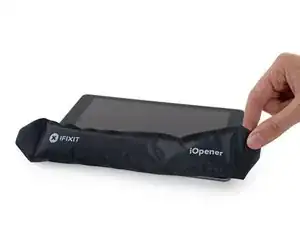
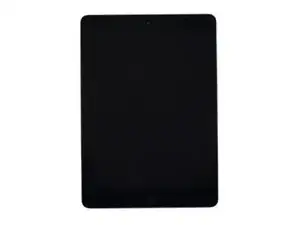
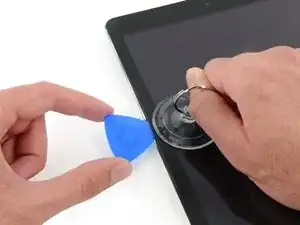
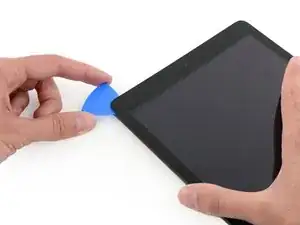
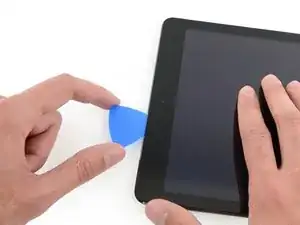
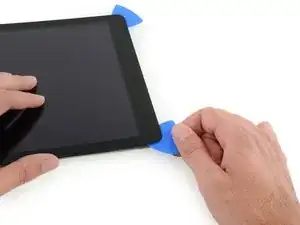
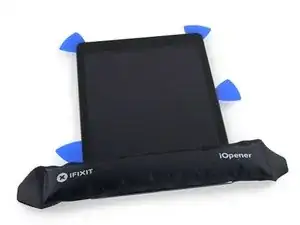
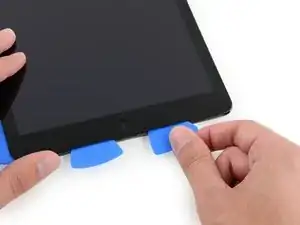
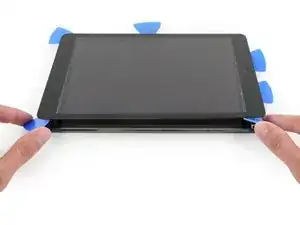
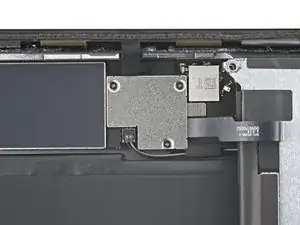
Gebruik deze handleiding om de batterij van je iPad 7 te vervangen.

Let op: deze handleiding is enkel bedoeld voor het Wi-Fi-model van de iPad 7. Voor het LTE-model bezoek je deze pagina.

Ontlaad de batterij van je toestel tot onder de 25% voordat je begint met het demonteren van je iPad. Dit verkleint het risico op het in brand vliegen van je batterij als deze tijdens de reparatie per ongeluk beschadigd raakt. Neem, als je batterij gezwollen is, de juiste voorzorgsmaatregelen.

Ga voorzichtig te werk bij het isoleren van de batterij met behulp van een batterijblocker. Het is namelijk erg gemakkelijk om de contacten van de batterij onomkeerbaar te beschadigen. Als je ervoor kiest de handleiding te volgen zonder de batterij te blokkeren, zorg dan dat je geen metalen tools gebruikt tenzij strikt noodzakelijk (zoals bij het verwijderen van schroeven). Zo voorkom je dat je kortsluiting maakt en gevoelige elektrische onderdelen beschadigt.

Sommige afbeeldingen in deze handleiding laten een ander model zien en kan visueel dus lichtjes afwijken van het model dat je voor je hebt liggen. Dit heeft echter geen invloed op de procedure in deze handleiding.

  1. PFpjwVSYrnq3JQap
    PFpjwVSYrnq3JQap
    RFsyoneYVYQDPSht
    • We raden je aan je magnetron schoon te maken voordat je verdergaat, zodat je voorkomt dat er viezigheid op je iOpener komt en eraan blijft hangen.

    • Plaats de iOpener in het midden van de magnetron.

    • Voor carousel-magnetrons: zorg dat de schijf vrij kan draaien. Als je iOpener klem komt te zitten, kan deze oververhit raken en verbranden.

    I didn't find this to be as hard as I had built it up in my mind to be; HOWEVER, saying that I need to say years ago I was the local Nokia service center in my town. But many years ago right after they got rid of analog times. Yeah. A classic installer/repairer mistake when starting something they haven't fixed or installed before is picking up the instructions, flipping through them; maybe even reading a section that is new-then tossing the instructions over the shoulder. "I got this." This usually comes right before something major gets broke. And I can tell you when you try to do it yourself and then mess it up horribly then take it to the repair shop. Well we called that "I can do it myself" syndrome and charged extra to put back together what they brought in in the box. Now knowing all this - I can't stress this enough because I am stupid, stupid, stupid. COVER YOUR SCREEN IN CLEAR BOXING TAPE AND READ ALL THE INSTRUCTION BELOW THROUGH TO THE END BEFORE EVEN ATTEMPTING THIS FIX. Take my advise.

    windizy -

    I didn't have an iOpener, so I used a wheat type heat bag. If you do this though, make sure you put a layer of plastic between your Mac and the bag, or you'll get condensation in places you don't want it.

    Martin Gray -

    I started out using the iOpener but switched to my wife's hairdryer. A heat gun or hair dryer proved to be much more convenient and is a time saviour. You can heat more and the glue becomes more fluid make the next steps with the opening picks much easier

    Jan Van Puymbroeck -

    I know this is obvious, but backup your iPad with iTunes before you start. I'd also turn off your passcode if you have one.

    Laurie Higgins -

    Ther first time you heat up the iOpener for this repair when its room temperature I had to heat it up for more than 30 seconds. I remember I had to heat it up for around 45 seconds. However, after that when you need to reheat it again during the repair 30 seconds will be enough.

    Yousef Ghalib -

    I used the wheat bag in a sensor microwave heating up to 65-70 deg C (155 def F).

    ian cheong -

    Get yourself a cherry pit bean bag the size of your iPad. Heat it, put the iPad on it for 3 to 5 minutes or so, reheat the cherry pit bean bag, again put your iPad on it. Then heat the iOpener and start working. The cherry pit bean bag will have to be reheated several times, but it will soften the adhesive so you have less problems with the iOpener

    Tim Feyaerts -

    The heating can be done very effectively (and quickly) with 3d printer heated bed. Make sure the bed is clean. Set the temperature to 60c, (130f ) and put the ipad face down for +/- 10 minutes. Repeat as needed throughout the “gentle prying” stages.

    polleyphony -

    The iOpener did not work at all for me.

    I had to use a heat gun and bring the edges of the case up to ~200 degrees (used an infrared thermometer to measure) before the glue would weaken. This obviously superheated the metal frame, so I also had to wear gloves to handle the phone while prying the back off with the included picks.

    Mike Jeanette -

    Repair instructions worked like a charm. Had to be patient with the iOpener and getting the screen off. I tried repeatedly without success until shifting the suction cup a bit to the left side where perhaps the glue had loosened up a bit more.

    Kyle -

    The iOpener, in my opinion, is of no help. Many warnings to say “don’t warm it too much”, but the glue doesn’t melt if not warm enough. As a result, a complete waste of time and energy. In addition, too much liquid in it, so it doesn’t lay on the device on a sufficient surface. I took a hairdryer and it worked much much better.

    laurentvidu -

    I used an immersion bath to heat this to 180F and applied it to the device until the outside temperature of the opener read 150F with an IR thermometer. Removing the screen took very little force with this method.

    breadandbits -

    My experience. I was replacing the screen which had been cracked and a little shattered in some places. The iopener is pretty much useless, so was the suction cup. The suction cup would probably be more useful if I was doing something besides the screen. Also you probably want the clean the screen before using it so it can get good suction. I used a hair dryer on high for a couple of minutes at a time (someone on this tread suggested that). I used my exacto knife and a razor blade to get into the adhesive. First the exacto to get the initial cut, then the razor blade to go a little deeper. Could have probably just used the razor blade, but the exacto has a little more finesse. I got the razor blade in and a little under the glass then I used the picks to wedge in. I didn’t want to risk anything using the razor blade too much. Used tape to keep the shattered glass together.

    trebor65 -

    My experience pt2

    Fortunately the shattering was mostly on the edges and most of it had adhesive on the back so it stuck together. Just take your time and work your way around following the guide to get the screen off. Have some goof off or goo be gone to clean the frame when putting the new glass on or putting the existing one back. (someone suggested that also, very good idea). Be careful of the LCD (you should know that). The cable on my LCD was pretty tight, so I propped it up while taking the cable cover off and when I put it back on I did the same thing. I just put a bottle on the battery and leaned the back of the LCD on that while attaching the cables and putting the screws back on the cover. Also be careful with the home button and the bracket on the back of it. I had enough old adhesive on left on the bracket that it stuck back to the new glass fine. So far only 12 hours in, so we will see how that holds up when the kids get at it.

    trebor65 -

    Another alternative if you do not have the iopener is to use a bed time hotwater bottle. Do not over fill it though. Just put enough hot water in to support the phone while you work around the adhesive.

    I use both the hot water bottle and iopener together on Samsung's. It makes life easier

    gazza667 -

    I followed the directions and heated my iOpener for 30 seconds in a 1000 watt microwave, and it came out at 160 degrees F, as verified by a infrared thermometer. This allowed me to separate the last bit of the back of my Samsung S8, which was already coming off due to a swollen battery (hence the reason for the repair).

    Dennis -

    Hallo,habe den Akku erfolgreich getauscht.Doch seitdem gibt es bei Telefonaten eine Rückkopplung für den anrufenden.Bei mir ist alles normal.Woran liegt das?Mfg

    Manu R -

    If you follow these instructions, you will crack your screen like I did. Heating the iOpener for 30 seconds, using it to melt glue, then waiting 10 minutes to reheat is useless. The iOpener can be used to maybe warm the glue on whatever side you aren’t working on. You need a hairdryer and/or a heat gun to melt the glue and separate the glass from the iPad.

    Anyone want to buy an old iPad with broken glass and a dead battery?

    mpulliam -

    Not everybody has a microwave. You should provide a target temperature for the iOpener and instructions for a conventional oven, or pot of warm water, or whatever. Although I will probably use a heat gun …

    Esmond Pitt -

    Three times heating opener and no luck. Tried pressing down gently on opener with a towel, and the opener broke. Wondering if I now replace table mats, fancy table cloth, etc. or will this stuff wash out.

    Not impressed so far. Maybe the hair dryer next.

    doug -

    I support the comments about the iOpener. Everyone has a hair drier, FHS, so get a cheap IR thermometer (£18) and blow heat until the area is 60+ deg C. Still takes w while, and getting the screen off is v scary, but just add more heat if you feel resistance.

    The rest of the kit is good, esp the magnetic screwdrivers.

    Richard O'Brien -

    No, everyone does not have a hairdryer. Some of us don’t even have hair. Thank goodness I already had an IR thermometer, though.

    nin10doh -

    #### WARNUNG WENN MINIMALSTER SPRUNG IM DISPLAY IST FUNKTIONERT DAS NICHT!!! ######

    Hatte einen winzigen, minimalen Sprung im Display. Ich dachte es könnte gehen, weil der Sprung “abgeschlossen” war. Er hat in einer Ecke ein winzige Glasteil rausgeschnitten. NEIN! Geht nicht. Habe alles mit viel Geduld dem iOpener und einem Föhn erhitzt. Es ist trotzdem sofort über das komplette Display zersprungen…

    T z -

    I’ve started with iOpener but changed very quickly to a heatgun. That was more efficient.

    Mizzoo, s.r.o. -

    I could not get the iOpener hot enough to melt the glue on my ipad 6. I heated for 45 seconds once and it was boiling and it still never worked. Thank goodness contributors mentioned using a hair dryer. Using an 1700w hair dryer on high did the trick to get the screen off. Still took some time and the case got pretty hot but be patient. It took twice as long and a lot more patience to get the battery out.

    Randal Haufler -

    I have an Ipad with touch screen issue, if i replace this part it should be Ok?

    janderson martin -

    WARNING - DO NOT MICROWAVE ON A METAL MICROWAVE RACK

    The metal microwave rack can heat up and melt through the iOpener cover letting the contents leak out.

    Not a big issue for me as I have a heat gun and used that instead.

    Run Up A Tree -

    I opened my iPad with the iOpener. Be patient! It may take quite a bit longer to it the iOpener in the microwave than it says in the guide. My microwave can only do 800W and I had to put the iOpener in several times (maybe a total of 90-120 seconds). I recommend that you have the transparent side up an watch the bag carefully. As long a the bag doesn't bloat up and the liquid doesn't start bubbling you should be fine. But I recommend to take the iO out from time to time to check it. (More comments in Step 6.)

    marcelflueeler -

    I gave upon the I opener and used a hairdryer. (Fixed an iPad 6)

    Tom Weber -

    iPad mini gen5. I used the iOpener. My microwave is 1200w with carousel. 30 sec got the iOpener to 155ºF. For the 2nd heating, after 10 minutes sitting, the temp was still around 125º so I only cooked it for 15 sec. Not enough increase so +5 sec more which me to 165-170ºF. This should be considered ballpark info because who knows the real output of the various microwaves and the quality of the IR tool used to determine temp.

    To successfully open my iPad mini I applied the iOpener twice to the left edge and twice to bottom. & once to R edge. Using the suction cup was difficult for me (I'm in my 70's so my hands don't work too well anymore). I had trouble holding the guitar pick and slipping them in (at an downward angle). In the end, sliding my thumbnail along the edge opened it very slightly and allowed the pick to get into the gap. I marked the ends of all my picks with a sharpie pen for the recommended 2mm insertion to avoid going in too deep. To get the screen open it took me approx 1 hour.

    jharrison -

    Can’t you just use a hair curler instead?

    Aspect22 -

    A hairdryer or heat gun works, if heating is kept around 100 deg C (212 deg F - boiling point of water). But… heating this way is cumbersome. Using a hotplate, set to 100 deg C, measured carefully with a fairly inexpensive IR gun, is simpler and easier, if you can afford the hotplate (I used an old pancake griddle with a thermostat knob). It works great for phones, setting them face down for 2 minutes, then picking them up with insulated gloves - cheap, wool gloves work fine. This may require repeated reheating to continue the display removal, but its much simpler.

    Because its almost impossible to repeatedly lay an iPad/tablet on the hot plate, I propose an alternative.

    Initially lay the larger iPad/tablet, face down, for 2 min, to heat all of the adhesive surrounding the display. Lift and begin the picking process describe in your removal steps. Then lay an iOpener on the hotplate for 2 min (already set to the exact, desired temp) to bring it to working temp for the remaining operations.

    Dan Smith -

    For iPads in particular, it makes sense to construct a simple, aluminum window frame, laid on a hotplate (see my comment above) that only touches the edges of the display, heating only the adhesive underneath. This prevents general heating of the entire device. Four strips of aluminum, placed together as a frame, would be the simplest and allow variations for all devices - envision it as a pinwheel of strips, radiating outward. Use it for any size device.

    Dan Smith -

    BTW, always read all comments at each step. New, and possibly useful, suggestions appear on occasion that can be crucial.

    Dan Smith -

    My iOpener got damaged at the first heating (30 s @ 800 W). The bag got a little melted hole where the liquid came out and a little melted area. I used a combination oven (normal heat and microwave) in microwave only mode. It has a metal grill where the iOpener was placed on. I suppose the metal grill concentrates the microwaves at some points and there the bag melted?

    K. Fe -

  2. ylYXoFMbBeXNAIyj
    • Verwarm de iOpener gedurende dertig seconden.

    • Afhankelijk van het wattage van je magnetron kan dit langer of korter duren. De iOpener is warm genoeg als deze net iets te warm is om comfortabel aan te kunnen raken.

    • Tijdens de reparatieprocedure, en terwijl de iOpener afkoelt, kun je deze opnieuw verwarmen in fases van dertig seconden.

    • Let erop dat je de iOpener niet oververhit tijdens de reparatie. Oververhitting kan ervoor zorgen dat de iOpener barst. Verwarm nooit boven de 100°C (212°F)

    • Raak de iOpener nooit aan als deze gezwollen lijkt.

    • Als de iOpener in het midden nog steeds te heet is om aan te raken, kun je het nog steeds gebruiken, maar moet je wachten tot deze iets is afgekoeld voordat je deze opnieuw opwarmt. Een goed opgewarmde iOpener zou ongeveer 10 minuten warm moeten blijven.

    I had to heat mine up for more than 30 seconds. After 30 seconds on high it was only warm. It had to keep trying different times and checking it until it got hot. I think the initial time that I put it in for was over a minute.

    whale13 -

    DO NOT USE IN NON ROTATING MICROWAVE! It will pop a hole. I had it in for 45 seconds the first time. It wasn't very hot inside and I saw it started to leak on the paper towel I put under it. Just a fair bit of advice. I think I will just stick with the heat gun. Loud but useful.

    Alex Jackson -

    I heated mine up for 30 seconds, tested, then again for 30 seconds. It felt adequately hot. Leaving it on the left side, per the instruction, for a minute did not loosen the adhesive. I ended up pulling the suction cup hard enough to shadder the old screen. Moral of the story, I don't think it gets hot enough safely to have an affect.

    Travis Dixon -

    There is a clear problem here with the heating part using the iopener things....no details are given. Whoever is testing them needs to make it clear - What temperature does it need to be? And for which phone models, because they differ in what's needed. It's only £10-15 for a laser guided temp sensor unit, and the designers/repairers should have one of those already for doing these kinds of repairs. Explaining half a repair, is worse than not explaining at all :-(

    assortedrubbish -

    All phones/devices differ it’s unrealistic and unsafe to put a exact time/temperature needed to soften the adhesive. It’s really quite simple you warm the device evenly and in a controlled manner just enough to enable pry tools and picks to begin separating. Best tool in my opinion but again this is because I have experience is a hot plate and heat gun both of which are used at nearly the lowest settings and I can handle flat palming the plate for almost 10 seconds I leave the device to conduct heat until approx it’s about 110 at most 120 ish this will be plenty to soften all the adhesive if any problem areas I use heat gun while prying. Again you need go slowly and learn with a throw away phone

    Greg Latta -

    I used a hot water bottle, works well as it covers the whole screen and stays hot for longer.

    dave -

    Now that is a very good idea :) I was going to use a hairdryer

    Maz -

    If I may suggest include your microwave wattage so people can get an idea on time for there own

    Patrick Storey -

    I agree with this.

    Jarl Friis -

    I ended up using a hair dryer. That iOpener thing took forever.

    mark fitzgerald -

    30 seconds sure isn’t cutting it… 45 didn’t get the screen of my iPad air 2 to budge either… even after resting on the ipad for 4 minutes.

    60 seconds in the microwave, the iOpener burst.

    I’ll get a new one and try once more with heating it 45 seconds and repeat that for 30 minutes like others have said here. If that doesn’t work it’ll have to be the heat gun.

    K

    Karl Marble -

    I can’t recommend the microwave. If the the iOpener becomes too hot, it bursts. Better put the opener in cooking water. Dry it and use it. Instead of an iOpener you can use hot/cool packs as well.

    Bernhard Keim -

    Great idea with using the heat packs. I will try that next time. Thank you

    Collins -

    Trust the directions! I forgot and left it in the Microwave too long and after 1 minute I had Mt Vesuvius - the iOpener burst and spewed the goodies out. The problem is, the Digitizer can be damaged by a hot air gun, so I had to tough out and remove the glue the hard way. I made it … with lots of patience! Tough lesson.

    Larry Bennett -

    I also used a hairdryer. I used it on the low setting and I cut a piece of carboard to protect the rest of the screen. The iFixit tool and method is vert tedious and very time consuming in comparison. With the hairdryer method you can literally have the display apart in a few minutes. Using your other hand nearby the area you are heating it should be very hot but not enough to burn your hand. You only have to heat metal part of case near glass edge. If you have a cellular model then you need to be very careful because the black antenna area is plastic. So less heat and work your way up in adding heat just enough to separate around the area but not so much you melt the plastic!

    Fixrights -

    iOpener was the worst part of the kit. Followed directions for :30 in microwave and took 4 trips to the microwave to loosen adhesive on left side of home button. I thought I was figuring it out and it was working well… even set a timer to wait 10 minutes between heating it up. Was on the right side and was on my 12th heat up when it exploded in the microwave. My only tip is that if you set it clear side up, as soon as you see any bubbles or boiling in the liquid, STOP! If you put a pot holder over the iOpener and press slightly to make good surface contact, that seemed to help. I finished heating with a “Corn Sack” that held heat better than the provided iOpener.

    digital_only -

    Mon iopener n'a pas tenu une réparation. Je ne vous conseille pas ce produit

    Berard Romain -

    Bonjour,

    Nous sommes désolés que votre réparation ne se soit pas déroulée comme prévu. Il se peut que le produit était défectueux. Veuillez contacter notre service client support@ifixit.com (boutique américaine) ou eustore@ifixit.com (boutique européenne) en décrivant ce qui s’est passé.

    Claire Miesch -

    Readers looking for temperature advice might check the comments of the previous instruction, as there are more there. I used an immersion bath to heat this to 180F and applied it to the device until the outside temperature of the opener read 150F with an IR thermometer. Removing the screen took very little force with this method.

    breadandbits -

    Thank you for posting some actual temperatures. I have a heat gun with a very fine self-temperature regulation setting capability.

    I will set it for 150-180 F, and use that to soften the adhesive.

    G Trieste -

    Get a heat gun.

    alesha adamson -

    I followed the directions and heated my iOpener for 30 seconds in a 1000 watt microwave, and it came out at 160 degrees F, as verified by a infrared thermometer. A second heating about 15 minutes later in the micro and it came out at 190 degrees F. Plenty hot enough to soften the adhesive for removing the back on my S8. Based on the comments above I think people just need to use more patience.

    Dennis -

    I used various time settings. It got very hot. It would soften the glue but not a whole lot. If my screen had been intact and I was replacing something that was not a digitizer, it may have worked. A broken screen makes the process significantly more difficult. I ended up breaking the home button cable. Good bye TouchID…

    cvela90 -

    After reading previous comments I didn't even use the i-opener. Used the heatgun ( hairdryer ) which works great for me. Maybe I was lucky as this is my first attempt at replacing a cellphone battery. Motoz 3

    Collins -

    It appeared 30 seconds were not enough, so I heated it more, by 5 seconds at a time until I got the right temperature about 70 degrees Celsius (measured with infrared pistol) to get the screen heated up to 60 C, the best for softening the glue. But the heat was quickly dissipating by the big aluminum back cover, so the best I got in 2 minutes of applying iOpener was around 45 C, which made the procedure difficult and having risk of breaking the screen. So I eventually abandoned iOpener and user a hot air gun with precise temperature setup. I set it to 90 C, which allowed me to open my iPad quickly and safely.

    Sergey Kofanov -

    I, too, ended up using a hot air gun. I’ve done earlier versions of iPad before but the adhesive used on this IPad 5 A1822 was particularly difficult to remove.

    Also, while the suction cup worked great when the glass is in tact, any cracks in the glass make the suction cup useless.

    manningrl -

    You need to remember here are different sizes of microwaves. I had the same issue.

    Heating on a smaller unit I used 45-60 seconds. That worked but was time comsuming

    William Draheim -

    Yeah, the iOpener didn't work for me either.... ended up using a hair dryer and that worked. The iOpener was too warm to soften the glue in my case.

    Andrés Vettori -

    I had a rotating plate microwave for my repair, and heating the iOpener 30-40 seconds worked plenty well for me.

    Ciarán -

    I tried 600W microwave for 30 sec and it was nicely warm, did nothing on iPad. Added 10 more sec, bit warmer, another 20 sec and it was finally a bit hot to hot in the hand - but still didn't do anything on iPad. I switched to a hair dryer as I used to work with it before, while being a bit sad about not using this brand new iOpener tool. And I found it short on 12.9 iPad anyway, maybe next time.

    Liibo -

  3. Q3OPkaQyxV6cdnx3
    • Verwijder de iOpener uit de magnetron door deze bij een van de twee platte eindes te pakken en het midden te vermijden.

    • De iOpener zal erg heet zijn dus wees voorzichtig bij het vastpakken ervan. Gebruik, indien nodig, een overhandschoen.

    I did this repair. I used a hair dryer, I think it works better: gets very hot fast.

    Cobus de Beer -

    I did too, you get far more control and no expense on fancy equipment.

    Billinski -

    Readers looking for temperature advice might check the comments of the previous instruction, as there are more there. I used an immersion bath to heat this to 180F and applied it to the device until the outside temperature of the opener read 150F with an IR thermometer. Removing the screen took very little force with this method. I don’t know how much microwaves vary in heating consistency with these pads, but knowing how inconsistent the temperature of a bowl of plain rice gets in my microwave, I wasn’t interested in even trying to use it for this.

    breadandbits -

    I used an electric griddle set to the lowest setting. It seemed to work very well.

    John -

    I vote for the hair dryer. The other methods work too but if you aren’t having any luck, switch to the hair dryer. While holding the iPad in my hand, I found that I am aiming the dryer at my finger at the same time and it gauges how hot it is. I stop when my finger can’t take it - maybe five seconds up close. Repeat as needed like I did.

    Robin -

    This thing melts when placed up side down in the microwave…

    Mark -

    If the maximum temperature for this iOpener is lower than the gadget glue minimum temperature, this device does not make sense.
    I think the maximum temperature for this iOpener is below 100⁰C and most gadget glue minimum temperature is higher than 100⁰C. So the iOpener is useless for many opening steps in repair guides. But who knows because temperature range is not specified for this iOpener.

    Jarl Friis -

  4. 2Nj3CEcEUHn2EtLQ
    2Nj3CEcEUHn2EtLQ
    lgRIBJjmHo2vTdda
    • Als je geen magnetron hebt, kun je deze stappen gebruiken om je iOpener in kokend water te verwarmen.

    • Vul een pan met genoeg water om de iOpener volledig in onder te dompelen.

    • Verwarm het water tot het kookt. Zet het vuur uit.

    • Leg je iOpener gedurende 2-3 minuten in het hete water. Zorg dat de iOpener volledig in het water ligt.

    • Gebruik een tang om de iOpener uit de pan te halen.

    • Droog je iOpener grondig met een handdoek.

    • De iOpener zal erg heet zijn, dus zorg dat je deze enkel bij de uiteindes vastpakt.

    • Je iOpener is gereed om te worden gebruikt! als je je iOpener opnieuw op wilt warmen, verwarm je het water weer tot het kookt, zet je het vuur uit en plaats je de iOpener gedurende 2-3 minuten in het water.

    What do I do if I don’t have a iopener?

    alexdelarge103@gmail.com -

    Use a hair dryer

    Edited To the max -

    2 or 3 cups Rice in a sock, heat for about 2 minutes. But, I recommend the iopener.

    Robert Garcia -

    When boiling in water you can put the iopener in a ziplock to keep it dry.

    Robert Garcia -

    Even if you don't put in a ziplock bag, I found that the surface is mostly hydrophobic so drying it is very easy. I also didn't have tongs, but the bag is denser than water, so it sank and I attached clothes pins to the ends and was able to remove it with those.

    Jack Adrian Zappa -

    2-3 minutes in near boiling water, then 2-3 minutes on my s10+ and it was super easy to cut the glue off.

    Kipras Bielinskas -

    I have a question, if I have a pan, and I have water, and a mean to boil the water, won't it be easier and cheaper to just use that.

    Ollie Tan -

    Have you tried it? Water limits your temperature to 100℃, whereas 'pan on the stove' can easily get up to twice that. If your pan is even slightly warped, you'll have a few hot spots of direct conduction with convection everywhere else, heating things unevenly. Assuming you get the device up to temperature, how will you get it out without scratching it or burning yourself? After you're finished, do you really want to prepare food in the pan you warmed up adhesives and trace manufacturing substances in?

    .

    Boiling something form fitting to heat your device with is a lot more foolproof, and not being foolish is easier and cheaper. Direct pan heating can work, but you are leaving yourself open to a lot more problems than just taking the safe route.

    James Beegle -

    add a little basil and oregano on the pan peanuts cashews walnuts and bam it pops right off

    david pride -

    It's more 3 minutes than 2 minutes in hot water, in 2 minutes it's not getting hot enough I think. I used the combo iOpener + hair dryer for about 2 minutes and I could then insert a first opening pick easily. The first opening pick is the trickiest step, then if you go slowly and with patience around the screen with other opening picks, it works well.

    vincent becker -

  5. cbHhknNQZuH52rXR
    cbHhknNQZuH52rXR
    fxTQqMPurYGyRJx1
    RVcvcMZjrVloNAUQ
    • Als het glas van je scherm gebarsten is, kun je verdere barsten voorkomen door het scherm te beplakken met tape.

    • Breng een aantal lagen doorzichtige tape op het scherm van je iPad aan tot het gehele scherm bedekt is.

    • Dit zorgt ervoor dat de scherven bij elkaar blijven en biedt tevens meer structurele integriteit bij het omhoog wrikken en verwijderen van het scherm.

    • Doe je best om de rest van de procedure zo nauwgezet mogelijk te volgen. Als het glas echter eenmaal gebarsten is, is de kans groot dat het verder uit elkaar valt tijdens deze stap. Het kan daarom soms nodig zijn om scherven uit je toestel te verwijderen met behulp van een metalen tool.

    • Draag een veiligheidsbril om je ogen te beschermen en ga voorzichtig te werk.

    If you add clear packaging tape, it will create bubbles and the suction cup will become inefficient. To me it was impossible to remove the glass with the suction cup. Since the glass was very cracked, I had to resort to some tweaking with strong tape and pull the this off.

    jfmartin67 -

    If your screen is significantly cracked to the left edge, abandon this entire setup, prepare yourself for a 5-6 hour repair, expect a lot of patience, a lot of cursing and some good old American ingenuity. The suction cup and picks will not work. You have to carefully crack the glass yourself (w/out damaging the panel underneath and carefully pull it apart from the inside to the outside edges. Use a hairdryer to soften the glue under the cracked panel along the edges. Then use an exacto-knife to separate the pieces of the glued panel from the frame body, all the way around the device. Watch out for the home button ribbon connector when using the exacto-knife. There will be glue residue left over, carefully apply some goo-gone to a small area of a paper towel and wipe gently around the frame body to loosen the glue. Then use the plastic spudger tool to scrape off the excess glue.

    The iPad repair is VERY difficult. If you are a working adult, hire a pro. This is not for the faint of heart.

    aaroncope -

    The hairdryer option was way faster and easier than the iOpener. Be VERY careful not to damage the LCD- one small mistake will cost you an extra $100!

    Mike Martin -

    but I’m not American

    Andrew Williams -

    If your digitizer is shattered, the tape will help, but you’re going to need extra picks. Or a razor blade. See below.

    Blair Miller -

    Friendly observation that the image on this step is actually of an older ipad model as the side bezels are far too big. I don't know if that matters to anybody but a noob might see it and think this manual doesn't apply to them. : )

    notalawyer -

    Thank you! Yes things like this matter so much. I successfully replaced an iPhone 6LCD&Screen from the guide. Next was my iPad 2 and the guide said nothing about the power flex cable. They were only stressing about not severing the wifi cable. I followed instructions carefully. Got the screen off and bam. Power flex severed because it was left out of the guide. I saw it in the comments after. I’ll never follow a guide here again without reading the comments. I did receive a discount code for my next purchase but it still caused a lot of inconvience.

    Haley Hodges -

    I had the same experience. My glass was cracked all the way to the left side and the suction cup would not pull the glass up. The packaging tape also didn't help. The heat caused it to lift. I finally abandoned the tape, used a heat gun aimed very carefully at each broken piece of the screen. The picks did work with patience, but I just pulled off each broken part of the glass. I also found that pulling up on one broken part while heating in front of me would let the next piece pull up. I continued heating and breaking all the way around. Do the right side last. Took about 1 hour to get it off, and another hour to clean the old glue off the frame. BTW thanks to this web site and all the comments! No way I would have done this without all the help here! I am now clean and waiting for my new digitizer. I couldn't free the battery (below), so I left it powered up, and verified it till worked before throwing away the old glass. Vince

    Vince Asbridge -

    Taping with package tape doesn't work. You'll need a very large piece of tape if you go this route.

    Travis Dixon -

    Just finished successful repair. I would add this: most folks will be here because of cracked screen. This is not easy; believe the 'complex' rating on this repair. I put tape on my screen because it was badly cracked. This made the suction cup useless, because it just sucked the tape off the scree.n. I used the razor blade technique which worked great, it should be used in the demo, and a good blade should be in the kit.

    dale kingsbury -

    I thought this shouldn’t be too hard - I only had some cracks in the glass, but then at every spot I worked on, the glass turned into nothing but tons of tiny shards. I had to use the points of the tweezers plowing along only the outer edge all the way around, sometimes with a razor blade and often using a hair dryer up close (briefly, over and over). After I got every bit of glass out, I used ordinary rubbing alcohol and Q-tips but I had to rub hard and quickly 100 times on each area to slowly dissolve the glue. I only scratched the LCD once slightly with a tweezer slip. The large chucks of display held together by the packing tape needs something under it to protect the LCD while you are working.

    Robin -

    Using Goo Gone to get rid of the adhesive residue is 20 times faster than using rubbing alcohol, even if it is 91% isopropyl alcohol.

    Skipping the iOpener and using a hair blowdryer, and using Goo Gone in place of the rubbing alcohol are 2 simple changes that will make this job much much easier than the default instructions if the screen is shattered.

    Scott Walker -

    I found the hair dryer is far more effective and less dangerous than using the iopener. If you overheat the iopener you end up pulling a hot plastic bag spewing hot glycerine out of your microwave! Not fun!

    Clifford Sullivan -

    I have an Ipad with touch screen issue, if i replace this part it should be Ok?

    janderson martin -

    Packing tape won’t do anything. You need to use duct tape to prevent glass shards from spraying everywhere. If your screen is only partially cracked (mine was the top only), modify the directions and focus on the areas that aren’t cracked first. I was able to get the lower 90% of the screen off, and then worked the cracked pieces with a heat gun and metal razor spudger. The entire repair took around 3 hours, and prob 2 hours and 30 min of that was getting the shards out and pieces off. And lots of cursing. I also told my kids if they crack another screen they are out of luck. I am not doing this again.

    Janie Hughes -

  6. DW4mglwsQfSf1ZHt
    DW4mglwsQfSf1ZHt
    gIrMbma3Qh3sjXeC
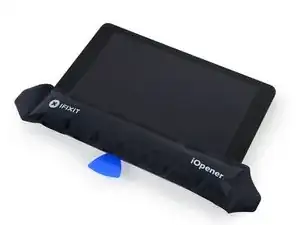
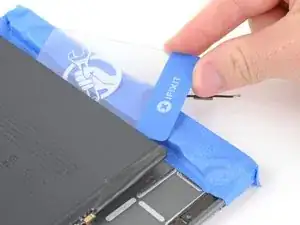
    • Plaats een verwarmde iOpener op de linkerzijde van het iPad-scherm, links van de thuisknopmodule.

    • Laat je iOpener gedurende minimaal een minuut liggen om de lijm onder het scherm te verzwakken.

    The iOpener doesn't work because the heat isn't strong enough. I used a hair dryer which proved to be much more efficient.

    jfmartin67 -

    The iOpener didnt work for me either. seems like it gets hot enough but it must not. I spent 30 min with the iOpener, then tried a hair dryer.

    kinchma -

    “At least a minute.” Bullshit. Get the iOpener good and hot, place it on the area you’re going to work on clear side down, and cover it with a towel. Walk away for 2 minutes. Make yourself a drink — you’ll need steady hands later.

    Blair Miller -

    I've done this with an iOpener and at least in my case, it worked fine. You may have to modify the heating instructions though, since not all microwaves are created equal.

    Jeff Suovanen -

    ii i just did this and it took a while but i figured it out it is true this thing doesnt get hot enough BUT heat it 2 times and then the 3rd time when u place it on the ipad put the ipad box on top and then maybe a second ipad on top of the box so it kinda smashes i down but not too much for it to break and then wait for it to turn warm THEN use the succion THEN the gap appears. the glue is super strong on the ipads so yea it will take some time lol

    Joel Tyson -

    Doesn't work. Perhaps include more copy on exactly how to do it?

    Travis Dixon -

    The iOpener does not work. It simply it is not hard enough to soften the glue. The heat hair dryer method does not work either.

    Javier Lozada -

    The goal is simply to weaken the glue enough that you can use your suction cup to open up a tiny gap under the glass, so you can insert an opening pick and slice through the adhesive. It doesn't actually take all that much heat; the picks will do most of the work once you get them in there. iOpeners, hair dryers, heat guns all work fine in my experience—the iOpener is just a bit more foolproof because it won't get hot enough to cook the display panel underneath.

    Jeff Suovanen -

    I used iron..surprise!! yeah pretty fast tho…put a layer of fabric (towel in my case) ontop, along the edge of screen and start ironing..

    :-)

    carvelera -

    If using a hair dryer or heat gun make sure it is not too high heat. My heat gun has two settings, one 750 degree and an 1100. After using it on high I discolored the digitizer and warped the LCD slightly (only shows on pure white backgrounds). Low worked for the rest of the repair just fine. Also using a razor blade or something besides the pick works nice for the initial pry. Once you have a gap big enough, insert the pic and you’re all set.

    Robert -

    I don’t have an iOpener, my heat gun wasn’t handy. The last time I did something like this it was a 90-100 degree day, so I just put it out in the sun for a while, and it worked great. This time it’s fall, so I used a 420W halogen Light that I have for photography. (A standard heat lamp would probably work too, but might take longer.) I held it close to the light until it felt hot to the touch, just a couple minutes, then I left is sitting about 16” below the light for 5-10 minutes to sink in and warm uniformly. It worked great.

    For me, steps 8-31 were basically one step "Carefully pry off the digitizer glass with the plastic tools" took all of 30 seconds.

    Seth Childers -

    Although very hard this does work. The first time opening the ipad after buying it 8+ years ago it took about 3 times of heating the iopener. It did require an amount of pressure I did not expect but it did come open as instructed. I did add a towel and apply pressure to the iopener to make sure the heat transferred.

    hmcarbajal -

    The iOpener didn’t work for me at all, zero, it literally did nothing. I resorted to my heat gun on low and yeah you need to be super careful, but once I started the adhesive came off pretty easy.

    David Yutzy -

    I used a 2-level heat gun, too. Supposedly 707 degrees/923 degrees.

    I kept the heat gun about 1” away from the glass and used only the low setting. Even so, I did alter the digitizer pretty quickly in a few locations around the edge. It still functions fine, and you only see it under certain circumstances, so not a huge deal. But irritating. Be cautious about too much heat. It just looks like sort of a faint, polarized grid.

    Don’t be afraid to put tension on the glue and just hold it. If it is warm enough, the glue will relax under sustained tension. This isn’t a speed event. Don’t try to rush it, or you’ll break something.

    Now that those infrared surface thermometers have become so inexpensive, it would be great if someone posted a target temperature for softening the glue without damage. That would take some of the guesswork out of this process.

    Tim -

    If you heat the iOpener somewhat longer than they recommend, and get it about as hot as your hand can stand, then place it on the iPad and cover with a towel for at least 3 minutes. Then really be patient. I got a bit impatient, and took a chance and slipped a really fine “exacto-type” of blade vertically beside the suction cup as I lifted, and thankfully that worked. That made enough room to get one of the “guitar pick” wedges in. The rest went fine.

    Pete -

    I used the iOpener to soften the adhesive. I was extra careful and it took me about 90 minutes to get to Step 30. With my acquired experience I would say, it may be done in about 30 minutes. Most important: Be patient! You may have to reheat the iOpener a few times until you will be able to do Step 9. Once I had this part done, it was a lot easier. So I would say the first 60 minutes I spent on steps 1 through 9.

    marcelflueeler -

    I’ve been using a heat and isopropyl alcohol combo on iPhone screens with no problem. This specifically says “only” heat. I feel like she’s trying to tell me to keep a lid on my IA. Because I don’t know what other methods some rogue might be trying in their efforts to compromise adhesive.

    Audi Archer -

  7. 5TKgSukRFUPmFkHT
    5TKgSukRFUPmFkHT
    Oae2WWxYTCKFiR6Y
    4BGiBDTZJlJjFLMH
    • Er bevinden zich een aantal kwetsbare onderdelen onder het scherm. Om schade te voorkomen verwarm je en wrik je enkel op de plekken die in iedere stap worden aangegeven.

    • Wees bij het volgen van de instructies extra voorzichtig en voorkom dat je in de buurt van de volgende gebieden wrikt:

    • De naar voren gerichte camera

    • Antennes

    • Schermkabels

    Don't assume anything!! I thought I was pulling on the screen connector and I was pulling on an antenna component instead. Didn't ruin its connection range but I sure remember doing it and now my iPad has a little internal flaw only I'm aware of.

    Travis Dixon -

    Correct me if I’m wrong but the LTE version apparently has 2 antennas on each side of the front-facing camera and it’s not shown on this post to avoid prying. I just scratched one of them following these instructions.

    Pacman -

    A note about the multiple image thumbnails - roll your mouse over them to get an animated effect, rather than clicking on them individually

    Rusty -

    I’ve been using a heat and isopropyl alcohol combo on iPhone screens with no problem. This specifically says “only” heat. I feel like she’s trying to tell me to keep a lid on my IA. Because I don’t know what other methods some rogue might be trying in their efforts to compromise adhesive.

    Audi Archer -

  8. gJnmHdpUyYU6Ica1
    gJnmHdpUyYU6Ica1
    viEoeYUmofDSjNud
    pASsvU4E1HVSBhOe
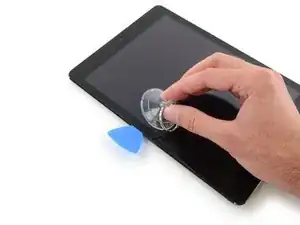
    • Druk nu een zuignap op de linkerzijde van het scherm, halverwege de iPad.

    • Zorg dat de zuignap vlak op het scherm ligt zodat deze zich goed vast kan zuigen.

    • Trek de zuignap, terwijl je de iPad met je andere hand vasthoudt, langzaam omhoog om het voorste paneel van de achterste behuizing te scheiden.

    • Als het glas van je scherm gebarsten is, kun je het beplakken met een laag doorzichtige tape, zodat de zuignap zich beter vast kan zuigen. Als alternatief kun je je scherm met een sterk stuk tape (zoals duct tape) omhoog proberen te trekken.

    In this picture above, the glass isn't cracked at all so it helps the suction cup to be effective as it is hermetic. With cracked display, it won't work.

    jfmartin67 -

    Suction cup would not work for me. No amount of heating with iOpener or hair dryer would allow even the slightest gap to form. I ended up looking at some YouTube videos and used a razor blade. I put the razor blade perpendicular to the top glass, right at the edge of the glass and pushed down until the blade went down 1/4". Then heated some more and pried up the glass enough to put in an opening pick. I spent a lot of time working with the suction cup. Glue was just too strong.

    kinchma -

    It's funny that iFixit changed the image they used. Even they themselves realized how stupid it was to try a suction cup on taped up surface. C'mon guys! You should at least make foot notes for your readers and let them know what to do if the glass is already shattered. It's a slow methodical process that involves working with a iOpener type tool. I personally have one that looks like a prison shank (lol)

    Scott S -

    Not sure what you are referring to there—I see no evidence in the document history of the photos having been changed. Suction cup + packing tape can work, but it depends how badly the glass is broken and the quality of the tape. Sometimes it takes a couple attempts. You can also skip the suction cup and try using tape alone to pull on the panel, if your tape is sticky enough. There are no guarantees though, which is why we have the disclaimer right in Step 4 that the procedure can be pretty fussy if you're working with a shattered panel. Depending on where it's broken and how badly, you're going to have to improvise.

    Jeff Suovanen -

    Jeff, the change is evident from image 4, where all the surface is taped up. In this picture you show a clean not broken surface and yes, the suction cup works...

    Simone Gabbriellini -

    Ah, I see what you're saying! I can understand why you guys would assume that, but in reality the entire guide was originally photographed using an intact panel. We later added a step showing how to protect yourself if you have a shattered panel (with photos to go along with, obviously). I'm afraid it wouldn't be practical to re-shoot the entire guide every time we make a small change like that.

    Jeff Suovanen -

    The suction cup is useless if your glass is shattered. Use a new, sharp razor blade, and insert it vertically between the edge of the glass and the metal back of the iPad. Don’t worry about pressing too hard — there’s a lip that stops the blade from going in too far and damaging anything. You’ll probably have to do this several times, but eventually the blade will “bite” into the edge of the glass well enough for you to pry it up. Insert a pick underneath the razor, then remove the razor and continue as directed.

    Blair Miller -

    After having to read several comments on this screen removal and the clear packing tape, I too have to agree that the tape method does not work well at all if your screen is already shattered. I combined several methods, with lots of patience to remove the screen on my iPad Air 2. What I found it very helpful was the heat gun used for paint removal. The heat gun generates a lot of concentrated heat at lower air velocity, unlike generic hair dryer, so you must be very careful not to ruin the electronics, and risk burning your hands and anything around it. My heat gun that I purchased from Home Depot had a nozzle to direct and focus the heat on a small area. That was helpful in working small area at a time. This method work thoroughly well.

    Taiji Saotome -

    It would work if you leave iopener in microwave for 1 minute.

    Don’t trust the instruction from ifixit.

    you can put iopener in microwave for 1 minute without any harm.

    Note. you have to make sure that it is in cold position before you put it into microwave.

    phongsiri nirachornkul -

    Suction cup didn’t work for me either, went the razor blade route (using an exacto knife blade) with very minimal damage to the aluminum shell. Be warned, if your screen has cracked along the edge (as it almost 100% certainly has if you’re reading this guide), the screen will continue to shatter and splinter as you make your way around the edge. That’s when having the screen taped up well will be to your advantage. There’s also a good chance you’ll have to re-insert the razor blade on the other side of a fracture and start the lifting process again, but keep going, being sure to avoid the points called out in this guide and you should be fine.

    Also, do not apply the suction cup to an area of the screen with cracks and no tape. If you’re near the edge you run the risk of brutally shattering that area of the glass if the glass gives before the suction cup.

    Micah Sledge -

    In order to get this to work for me I had to heat the IOpener to over 104 C - I needed to get the screen over 40 C before the adhesive would loosen.

    Also I had to put the ipad on a towel - the granite countertop it was on was sucking the heat out too fast.

    Jack Williams -

    This step was brutal on my nerves - read about too many people ruining their iOpener and I don’t have a heat gun. I had to keep heating the iOpener incrementally hoping I wouldn’t pop it. … but if you’re patient, persistent, and cautious, you can definitely tell when you’re seeing separation. The iOpener ended up being WAY hotter than 30 seconds was getting me - borderline scorching my hands.

    William Thompson -

    Could not loosen the adhesive using the iOpener. Had to use hair dryer.

    Erwin yi -

    As the others noted, the suction cup is useless on a cracked screen, especially if you’ve applied tape (like the instructions say you should). The screen I was working on was busted up pretty bad, I ended up removing it and then going back to remove the edge glass and adhesive. When you have a really busted screen just take your time and use a heat gun or good hot hair dryer and it will eventually come off.

    I used an iSesame tool vs a razor to pry the edge (from a previous replacement project) but again, the iOpener and suction cup are useless.

    David Yutzy -

    Thank you for the comments above. I was using the iOpener unsuccessfully, then turned to the hair dryer and heated it up for over 3 minutes. This gave me the gap I needed to insert the opening pick and begin the process. So, with patience and a hair dryer, I was able to get the digitizer off.

    0812mgr -

    You really need a lot of patience here (30-45min). But then it works. The best way was with this plastic "crowbar" to get the beginning. You really have to press hard to get in between.

    Arne Meier -

    The suction cup provided in the toolkit didn't work on anything. Tape helped, but I eventually went in through a small cracked shard to create an entry point at the bezel

    Tom Weber -

    I've passed on the iOpener as suggested in these comments and have tried to use a hairdryer. heating on high at medium speed for 1 minute then trying the suction cup. heating for another minute then using the suction cup. Been doing this for 1/2 an hour but it isn't working. Need to take a break because I'm afraid I'm going to hurt in internal components of the iPad 6 (just trying to replace a dead battery) Any suggestions ???

    Just a guy -

    LOL...i tried the pastic clear tape to hold the cracked glass then apply the hairdryer. It melted the plastic tape glue and thus making the handle with the duct tape useless and the duct tape just pulled the melted glue from the plastic packing tape up like butter. But the screen still not budging. I've tried the hair dryer for 5 mins and nothing. I've tried the iOpener and that's useless. I'm heating it up 30 secs a time. I tried 1 min. The screen is welded shut.

    brian -

  9. vCdsDqDSqKYdavRE
    vCdsDqDSqKYdavRE
    TsH5GkfTOA1aFD3K
    CRhqIHp4GnD3RHYQ
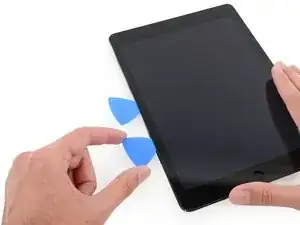
    • Plaats een openingsplectrum in de opening die je zojuist met behulp van je zuignap gecreëerd hebt.

    • Steek je openingsplectrum niet dieper dan de zwarte rand die je rondom het scherm ziet. Als je je plectrum wel dieper steekt, kun je je LCD beschadigen.

    • Trek aan de kleine lip op de zuignap om deze los te maken en verwijder deze van het scherm.

    I found it much easier to use a single edge razor blade instead of the pick. After getting that inserted, it was easy to slip the pick between the blade and the case. Disclaimer - Razor blades are very sharp and you could easily hurt yourself or your iPad if you use one.

    donprius -

    This is an amazing tip! After trying for 10 minutes to use the pick with no luck, I grabbed a small razor blade and that worked perfectly to get me started!! Thanks!!

    Ashley Garner -

    The suction cup also didn’t work to create a gap - it cracked the screen when i tried to lift (the screen was already cracked). This was after rotating between the iOpener and a microwavable hot pack for food. The iOpener was around 175 degrees, it brought the surface of the iPad to 130. I was finally able to lift the glass using a razor blade and then the picks like donprius. I continued to use the iOpener to loosen the glue around the rest of the iPad but I think a heat gun would have been more efficient.

    Marc Ducret -

    You have to heat the glue really much, or you will, as i did, crack the glass.

    Linus Grüne -

    Best bet is to mark the pick with a sharpie line on how far your maximum limit is so you don’t damage the LCD.

    Jon Snyder -

    The iOpener works well, be patient and keep reheating until you can see the screen start to give a little. I kept putting mine in the microwave and it worked faster when the iOpener was hotter. 40 second intervals did the trick for me eventually

    Jackson Taylor -

    I spent an hour trying to lift the screen of an iPad Air first gen. The trick I found was that its a combination of lifting the screen a millimetre and then wiggling a razor blade vertically in the slot between the screen and the metal frame (yes its a microscopic slot). I used a hair drier on a section of the edge of the middle of the screen as above. The middle area allows for a bit of flexibility in the rail - we’re talking 0.5mm which is just enough for the razor.

    So hit a section of the screen edge with the drier till its hot to touch, do the suction cap thing as above, insert the blade vertically and wiggle it *ever so slightly* in the slot as you don’t want to break anything. Keep repeating this until you see even the slightest rise in the screen under the cap. At this point, remove the razor and insert the blue pick. It should easily dig in and under the screen, but no further than the black border.

    Remember, small wiggly steps will avoid breaking anything. Better a number of small heat and wiggles than a lift and snap.

    Rusty -

    for those who need to open more than one iPad, the iflex is safer and more effective than a razor blade. i use it to get started then switch to a pick

    iFlex Opening Tool

    Stow -

    Yea, this suction cup cracked my glass. This made it near impossible to slide the picks around. I may try again another day, but I suspect it’s toast at this point.

    Jason Prothero -

    I should have noted the difficulty rating before thinking I could replace the battery myself. I could have saved myself the cost of replacing a cracked screen, which happened when I attempted this step. I did not want to overheat the iOpener but consequently, I could not get a pick inserted underneath the screen. (I think the glue must take a lot more heat than expected to melt.) So just a warning to more novice tinkerers—this repair wasn't the same as fiddling with screwdrivers and a million small parts.

    mlliu -

  10. LSHxkuvDXOfHLTCj
    • Verwarm en plaats je iOpener opnieuw.

    • Wees voorzichtig en voorkom dat je je iOpener in dit proces oververhit. Wacht altijd minimaal tien minuten voordat je je iOpener weer verwarmt.

    This says "Always wait at least two minutes before reheating the iOpener", however the iOpener itself has a warning printed upon it that says wait at least 10 minutes. And that 10 minutes warning is also mentioned in Step 2 above.

    Scott -

    Sorry about that! We fixed the text on this step. The two-minute interval was for an older version of the iOpener—the text printed on your iOpener will have the correct interval, which is indeed ten minutes. It can burst if overheated or reheated too quickly.

    Jeff Suovanen -

    It still says 2 Minutes up there in the warning

    Sandro Krumbein -

  11. AKajiYMuRpiYW1Ub
    AKajiYMuRpiYW1Ub
    6Y6lHbE2mWjFhNYY
    re6BCKFQt1aqamQs
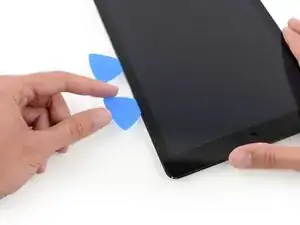
    • Plaats een tweede openingsplectrum langs de eerste plectrum en schuif deze langs de zijkant van de iPad omlaag. Zo snijd je de lijm onder het scherm door.

    You guys really need to show how it's done when your iPad isn't perfect like the one pictured above.. C'mon..

    Scott S -

    This is for BATTERY REPLACEMENT not CRACKED SCREEN REPLACEMENT!!

    Corey Barcus -

    How do you slide the picks when the glass is broken? Even with the glass taped, it pulls away from the tape rather than the housing. I've just further shattered the glass with my attempts.

    chrisweiler -

    With my shattered screen, I was able to remove it using the suction cup slightly and a metal pry, had to break the edge glass some for removal also but it didn’t do damage. More layers of shipping tape helped to make the screen stay together better and come off more intact.

    Jackson Taylor -

  12. UjRWDMLf2a4ns5RB
    UjRWDMLf2a4ns5RB
    Mj2dVlfDgvg6mVIH
    2qKhC3OC3vbWPKBs
    • Schuif je plectrum verder langs de zijkant van het scherm naar beneden om de lijm door te snijden.

    • Als je plectrum vast komt te zitten in de lijm kun je je plectrum als het ware door de opening rollen om verder te gaan met het doorsnijden van de lijm.

    This gives a false illusion to the difficulty of these repairs when you guys make guides using perfect devices. What about devices with dinged corners? A reader is gonna slap on a new screen and shatter it the second they apply pressure thinking it will fit into a dented corner lol

    Scott S -

  13. iuXiQUJAX4SURNbO
    iuXiQUJAX4SURNbO
    1LbBcTpyYjaaLJXd
    2fFDxI2GoD6WhcRS
    • Pak de eerste plectrum die je in de iPad hebt aangebracht vast en schuif deze langs de zijkant van de iPad naar boven.

    • Als je de punt van je plectrum door het glas van het scherm kunt zien, is dat geen reden voor paniek—trek enkel je plectrum een stukje terug. Waarschijnlijk is er geen schade, maar zorg wel dat dit niet te vaak gebeurt, aangezien je op deze manier lijm op je LCD kunt smeren, wat moeilijk te verwijderen is.

    I managed to get a couple of fingerprints on the LCD.

    What's the best way to clean 'em off?

    What's the safest way?

    Mike McIntosh -

    What I’ve read, and seems to work, is gentle circular pressure with a very clean, dry microfiber cloth. Lacking that, use a TINY drop of water ON THE CLOTH, not on the LCD. Small amounts of alcohol can be used, in my experience, but only if the above don’t work, and with better results if used in small amounts and applied to the cloth, not the LCD.

    Bonnie Baxter -

    Can confirm. Microfiber with a little isopropyl worked great to clean off any adhesive or fingerprints from mine. Thanks for the tip.

    Robert -

    If you dare to use alcohol on your device, at least use isopropyl alcohol, not ethanol!!!

    Pierre-Aurélien -

  14. ExVsRTYXI1ULiVWP
    • Verwarm je iOpener opnieuw en plaats deze op de bovenkant van de iPad, over de naar voren gerichte camera.

    • Wees voorzichtig en voorkom dat je je iOpener tijdens deze stappen oververhit. Wacht altijd minimaal tien minuten voordat je je iOpener opnieuw verwarmt.

    • Als je een flexibele iOpener hebt, kun je deze zo buigen dat zowel de linker bovenhoek als de bovenkant van de iPad tegelijkertijd worden verwarmd.

  15. r6PMwnNoqHqPDIZb
    r6PMwnNoqHqPDIZb
    fYwccxpTiRSOIqVd
    XZHVIgyFdy1QDKII
    • Schuif je plectrum langs de linker bovenhoek van de iPad om de lijm daar door te snijden.

    I broke the screen glass of my ipad just right when I moved the guitar pick towards the upperleft corner of the screen as depicted in your instructions. (Whereas my ipad screen was in perfect condition : no scratches, not broken at all...). There must be something wrong here. Be advised: move the pick towards the corner with caution !!!

    Pierre-Aurélien -

  16. yXL2cvSwMDcjKNG6
    yXL2cvSwMDcjKNG6
    FvdRFvwNZ3ay5hOP
    5B1bL5KFOi3ODYTE
    • Schuif je plectrum vervolgens langs de bovenkant van de iPad en stop net voordat je de naar voren gerichte camera bereikt.

    • De derde afbeelding laat je zien waar de naar voren gerichte camera en de behuizing zich in de iPad bevinden.

    • Voorkom dat je je plectrum over de naar voren gerichte camera schuift, aangezien je hiermee de lens of de camera zelf kunt beschadigen. De volgende stappen leggen in detail uit hoe je kunt voorkomen de camera te beschadigen.

  17. ZgSSjqygXHorY6tw
    ZgSSjqygXHorY6tw
    UEnI1soQu3c2o6Gn
    u22KHx1KcRINTmOw
    • Trek je plectrum een stukje terug en schuif enkel de punt van je plectrum langs de bovenkant van de naar voren gerichte camera.

    At this point I’d use paper tape on the margins of the screen to mask off areas where you should use caution with the pick. Its just a visual reminder not to run the picker too deep in these areas. They are: the camera lens, lower right hand side and where the two antenna are along the base. Step 6 third image highlights these areas.

    Rusty -

  18. 3uiJJQEGQYqDDvQb
    3uiJJQEGQYqDDvQb
    Gh5DjyO4CAqOdikH
    cUYg55ZxydIKgynu
    • Laat je plectrum, net na de naar voren gerichte camera, in de opening aan de bovenkant van de iPad zitten.

    • Pak een tweede openingsplectrum en steek deze links van de camera in de opening en schuif deze vervolgens naar de linker bovenhoek van de iPad om het doorsnijden van de lijm aan die kant van de iPad te voltooien.

  19. xFYxwFSBsRTiUyQU
    xFYxwFSBsRTiUyQU
    USTIycuZtm5LlfhE
    LIIscNSluuRqnPfF
    • Steek de vorige plectrum iets dieper in de opening aan de bovenkant van de iPad en schuif deze van de camera weg richting de rechter bovenhoek.

  20. k3tKRDGNNaetXDsf
    • Laat de drie plectrums in de hoeken van de iPad zitten om te voorkomen dat de lijm zich opnieuw aan het toestel gaat hechten.

    • Verwarm je iOpener nog een keer en leg deze op de rechterzijde van de iPad, langs de volume- en vergrendelknoppen.

  21. 1GQRTSkmTOrcbbbN
    1GQRTSkmTOrcbbbN
    KufsZrl6J2QKcHtW
    • Schuif je openingsplectrum langs de rechter bovenhoek van de iPad om de lijm daar door te snijden.

    • Laat je plectrum op z'n plek zitten om te voorkomen dat de lijm zich opnieuw aan het toestel gaat hechten. Gebruik voor de volgende stap een nieuwe plectrum.

  22. 2JCBSm2LNI1tbGnc
    2JCBSm2LNI1tbGnc
    H2xHKmG5XGOlFfgo
    HLRUNMGLaiQ4NsrJ
    • Breng een nieuwe openingsplectrum in de opening aan en schuif deze tot halverwege de rechterzijde van de iPad. Snijd onderweg alle lijm door.

    • De schermkabels bevinden zich ongeveer halverwege de onderkant van de iPad. Stop met schuiven en snijden als je ongeveer 11,5 (4.5") cm van de onderkant van de iPad bent.

    Why there’s such an obsession with not damaging the cables is beyond me. Be careful, so as not to damage what the cables are connected to. But the cables are part of the replacement digitizer, so if you nick or even slice through them (like I did with the one closest to the bottom) don’t worry about it.

    Blair Miller -

    Keep in mind that some people are here to open an intact display to replace internal components! In those cases, keeping the cables un-harmed is quite important ;)

    Sam Goldheart -

    My digitizer WAS ok and I was only replacing the battery I wasn't careful enough when coming around the side with the pics and got a hold of the cable just enough with the pic to pull it off the underside of the panel. The battery replacement went great other than now I have to replace the digitizer. :(

    BE CAREFUL WITH THIS STEP!!!

    Dylan Bouterse -

    And if you are replacing the digitizer, you have to reuse the fingerprint sensor home button. I sliced through mine and now I’ll not have fingerprint sensor. Each home button is matched to the main board and if switched out you will loose that sensor ability.

    David -

    Like others, I damaged my digitizer cable while doing a battery replacement. It would be a good idea to use some blue tape to mark the spots to avoid during the glue slicing procedure.

    donprius -

    I also damaaged the digitizer cable while doing a battery replacement. Use just the tip of the opening pick.

    Dean Gross -

    People need to realize iFixit routinely duplicates instructions for more than one type of repair/replacement. However, all of the comments are combined, which leads to confusion.

    laura moon -

  23. LkfmtbgAqUOpJ2gO
    • Laat de plectrums op hun plek zitten en leg de opnieuw verwarmde iOpener op de onderkant (over de thuisknop) van de iPad.

  24. VCgCYGpj4rC2Il13
    VCgCYGpj4rC2Il13
    KJIB31CbqQIsqUGw
    gvHHNylZmQvEAJVg
    • Schuif de onderste plectrum aan de linkerkant van de iPad richting de linker benedenhoek om de lijm in die hoek door te snijden.

    • Laat je plectrum in de hoek zitten. Ga niet verder met wrikken en verwijder de plectrum niet uit de iPad.

    • De derde afbeelding toont de twee antennes en de inkeping van de thuisknop in de onderste behuizing van de iPad.

    • De volgende stappen laten je zien waar te wrikken om te voorkomen dat je deze onderdelen beschadigt. Gebruik warmte en wrik enkel op de plekken die getoond worden.

  25. 3PCIHaK6lXM3okKM
    3PCIHaK6lXM3okKM
    QmhTwClipPILWGZl
    cpUdUHoDGShIQgGC
    • Laat de plectrum uit de laatste stap op z'n plek zitten om te voorkomen dat de lijm zich opnieuw aan het toestel hecht.

    • Pak een nieuwe plectrum en schuif deze voorzichtig over de linkerantenne heen. Stop met schuiven voor de thuisknop.

    • Schuif je plectrum enkel van buiten naar binnen en niet andersom. Als je dat wel doet, riskeer je de antenne te beschadigen.

    • Als je je plectrum meerdere keren moet gebruiken om de lijm door te snijden, verwijder je je plectrum, steek je deze aan de buitenkant weer in de opening en schuif je deze van buiten naar binnen.

    • Laat je plectrum op z'n plek zitten voordat je verdergaat.

  26. mUbC61nFQGD3IPHQ
    mUbC61nFQGD3IPHQ
    rtTkvkEpdQgBwKsp
    cIbGZCi4aqZLARtE
    • Pak nog een plectrum en plaats deze in de opening rechts van waar je je vorige plectrum hebt laten zitten.

    • Schuif enkel de punt van je plectrum langs de thuisknop en de rechterantenne om de lijm daar door te snijden.

  27. 3QykUJOBpUgB3r5W
    3QykUJOBpUgB3r5W
    IZRPVODhd5dWHXsg
    KXZBxPMUpkD3e5xR
    • Nu de lijm doorgesneden is, kun je een plectrum bij de rechter benedenhoek in de opening steken. Schuif je plectrum naar links en stop net voor de thuisknop.

    • Schuif je plectrum ook hier enkel van buiten naar binnen. Als je het andersom doet, riskeer je de antenne te beschadigen.

    This step needs a BIG CAVEAT to not insert the pick far enough to damage the home button/touch ID cable, as it is DIRECTLY above where you’re directing people to insert the pick. I just ruined a ribbon cable by following this guide too closely.

    tabormeister -

    Sadly only after damaging my home button flex cable, I read your comment. There should be a big warning here as it is very easy to tear this cable.

    Bouke -

    I also damaged the home button cable. Check the placement of the cables in steps 37-44.

    Paul Klein -

  28. FvSGif2mnZP5gaIc
    • Verwarm je iOpener nog een keer en leg deze vervolgens op de kant van de iPad waar ook de volumeknoppen zich bevinden.

  29. QjTVIhZwQupEXj6r
    QjTVIhZwQupEXj6r
    QFNHCLpff5RVZ12O
    • Wees erg voorzichtig in deze stap. Neem je tijd en zorg dat de lijm warm en zacht is en dat je alle lijm met je plectrum door hebt gesneden. Wees niet bang om te stoppen en alles opnieuw te verwarmen.

    • Aan de zijde van de iPad tegenover de volumeknoppen zou er een plectrum in iedere hoek moeten zitten. Draai deze plectrums lichtjes om om het glas wat omhoog te duwen. Trek de laatste stukjes lijm aan de kant van de schermkabels nu los.

    • Als je op weerstand stuit, laat je de plectrums op hun plek zitten en verwarm je je iPad nog een keer op de plekken die het meeste weerstand lijken te bieden.

    You will end up having to scrape the outter ledge to remove the old screen. I bled and got glass shards everywhere. Good luck!

    Travis Dixon -

    That won't happen if you use gloves and protective glasses!

    tanner85 -

  30. uAaZYGVVaiROjmFT
    uAaZYGVVaiROjmFT
    qcLoHc5AycwhgqJT
    • Til het scherm langzaam verder omhoog om de laatste stukken lijm aan de kant van de schermkabels los te maken.

    This is very tricky if the screen is cracked (which I would assume most people are replacing the screen because of a crack). Use duct tape to try and secure the shards as much as possible, but be prepared for shards flying everywhere. Search for videos on cracked screen removal, there’s a good ifixit one. Maybe they can link it here? I finally was able to get it all by using a heat gun and metal spudger/razor like the guy in the video.

    Janie Hughes -

  31. DgUIVaKlihTaqwLU
    DgUIVaKlihTaqwLU
    Os4NBQ2FQooXM1Ny
    DReXmNyHonEurCJU
    • Gebruik een openingsplectrum om de laatste stukken lijm door te snijden, terwijl je het scherm ondersteunt met een van je handen.

    • Wees erg voorzichtig en zorg dat je de schermkabels niet doorsnijdt of beschadigt.

    Detailed pictures that better indicate the difference between the remaining adhesive and the two mylar cables (the very cables you are trying to avoid damaging!) would be much appreciated. On my unit the two were VERY hard to distinguish.

    dlcatftwin -

    This step does not need to be performed here. I cut this adhesive once I had removed the lcd and display cables. This makes it much easier to avoid damaging anything. Just prop the glass up on something while you perform steps 31 - 42, then cut remaining adhesive and remove.

    Robert -

    The front camera has a black bezel cover but it is attached to the broken glass digitizer. Peel it off and save it. I plan to tack glue it to the camera instead of gluing it back to the new digitizer glass. It has two alignment bumps so maybe it doesn’t need gluing to either side but I found it on the ground when it came off of the the broken digitizer. I almost tossed it as part of the broken glass.

    Robin -

  32. kJe2hUFvw2lNaRNS
    kJe2hUFvw2lNaRNS
    ayc5GO4c5KUVsvU5
    • Als alle lijm eenmaal doorgesneden of losgekomen is, kun je het glazen paneel openen zoals je een boek zou openen. Leg het scherm vervolgens op je werkoppervlak.

    • Bij het weer in elkaar zetten van je toestel verwijder je alle lijmresten uit de behuizing (en van het scherm als je deze weer wilt gebruiken) met wat isopropyl alcohol en vervang je de oude lijm met behulp van op maat gesneden kleefstrips en onze handleiding voor het vervangen van de schermlijm.

    • Het is bij het weer in elkaar zetten van je toestel vrij gemakkelijk om per ongeluk een flexkabel tussen het scherm en het frame van de iPad te klemmen. Wees daarom voorzichtig en zorg dat alle kabels onder het frame komen te zitten. Als je de vouwen in een flexkabel volledig plat duwt, kunnen ze onherstelbaar beschadigd raken.

    my replacement digitizer has rigid flex with adhesive tape where the connectors extend. how does this “fold” back inside the frame?

    David -

    Same here. I removed the adhesive tape, but now what?

    Dvi -

    It looks like I have the same or similar question: the “hinge” part of the digitizer cables (the flap portion) looks like it is supposed to tuck into the crevice between the LCD panel and the side of the aluminum body - my replacement (from iFixit) has sticky contact on the upper side of this flap, making me think that its supposed to adhere to the side of the LCD panel, but the instructions do not make this clear - is my assumption correct?

    dlcatftwin -

    Or, does the flap adhere to the underside of the front panel’s right edge?

    dlcatftwin -

    I attempted to put this protrusion underneath the LCD, and it kept coming up above the LCD. As there were no instructions, I put it as best as I could underneath the LCD as I cannot imagine that it folds up against itself?

    Dvi -

    I tried to put it ‘inside’ the case but was not able to - at the end, I just glued it against the front glass.

    I must have done something wrong with the new home-button assembly as the fingerprint sensor does not work anymore - However, I am not going to go through that repair again so passcode it is.

    Michael Berneis -

    My screen from ifixit had the rigid flaps with adhesive also. I removed adhesive and adhered it to the new glass, it worked fine and solved the problem with the flaps not pushing down.

    Jackson Taylor -

    if there is adhesive glue on the inside of the digitizer and the top of the LCD what do you recommend to clean it.

    scprillwitz -

    Isopropyl alcohol (and certainly not ethanol!!!)

    Pierre-Aurélien -

    Don’t throw away your old screen until you take the home button off of it! My screen was shattered and I kind of have a phobia of broken glass, so I bundled it all up and threw it into the trash can immediately. Next day when I went to continue the job I was sad that my roommate had finally taken out the trash for once and my home button was halfway to the dump by then.

    Sparky -

    Cleaning with isopropyl alcohol is not really working well. I am using it with a qtip. Is there a certain way you recommend in order to actually the adhesive off?

    Brooke Parkhouse -

    Yes, the flap seemed to want to be attached to the glass, not go down the slot. All went together well, except that my home button doesn’t work. I suspect the connections wasn’t right, although I did my best to (gently but firmly) push it in. Too late to do anything about it now.

    Mussollini -

    I got my repair kit yesterday, had a go at it today on my iPad Air 1 (A1474). I’ve opened up phones before (the kind that open up easily), but first time dealing with a glued-together device. Anyway I got there, and now I’m putting things back together. I have a question regarding the pre-cut adhesive to hold the glass back on. Is it meant to be applied to the glass, or the frame?

    SHL -

    Ok never mind - I just looked at the digitizer for this iPad and saw that the adhesive is preapplied to the glass, which confirms my suspicions. Now I can proceed and bring this repair to a conclusion.

    SHL -

    And it’s done! Doing the battery calibration now, but I’m relieved that the battery is working. I did turn on the iPad prior to removing the blue strips on the adhesive to make sure it was working before committing to fix the glass in place.

    To reiterate the point, the adhesive strips go on the glass. The way they are packaged with the clear plastic makes it go very smoothly.

    There are 2 oversize pieces of plastic sandwiching the adhesive sections. These keep the strips in their original shape free of dust off until you are ready to use them. Once you remove these, there is another clear plastic strip which has an inside edge that matches the adhesive section’s inside edge. This plastic allows you to position the adhesive accurately on the glass while keeping your fingers away from it. This is especially important on the right side where the digitizer cables are. Once you remove this clear plastic, there is still the blue film with pull tabs. You can leave these on to do a power up test, then remove them. …cont

    SHL -

    … After doing the power on check, you can also check that all the buttons work, home button, camera, speakers etc. Then I turned it off (probably wasn’t necessary), removed the blue strips and pressed the glass in. For this last step I suggest lining up the left edge of the glass with its corresponding edge in the aluminum shell, and then gently pressing down on the right side. ALSO: while doing this last step, look carefully at the right side for the ribbon cables there. In my case (reusing original digitizer), they were protruding just a smidge, so I used the spudger to just nudge it a bit and they got into place, and then I pressed the right side down. I then pressed down all around the edges of the glass.

    SHL -

    quick question... if this is a replacement, why are we worrying about the digitizer cables? My glass is shattered pretty bad on the to the left of the home button where he says to work. So I can't apply suction cup there. I don't understand the need to be concerned about the cables if the digitizer is going to be trashed...

    Michael M -

    I'd like to add when at this stage and you notice some of the old black adhesive may be hanging off the digitizer DO NOT remove any of it. Wait until you have to thing fully removed. It's way too easy to tear one of the cables if you try removing it now.

    Lindsey W -

    I would clarify a detail for this step...Before turning the screen like a book page, LOOK CAREFULLY at the state of the Home button cable... Despite I turned the screen slowly, the cable resulted cut... Now I will have to order a home button group. Sigh!

    Migraz -

    I would like to clarify a detail of this step. BEFORE turning the screen like a book page, LOOK CAREFULLY at the home button cable... You risk to cut the cable during the turning operation.

    Migraz -

  33. Zag51Fn3jeTg5XDo
    Zag51Fn3jeTg5XDo
    KEwuHhb1vSWKRMwD
    • Gebruik een kruiskopschroevendraaier om de vier 4.3 mm lange schroeven, waarmee de LCD aan het frame bevestigd is, te verwijderen.

    • Verwijder alle tape die over de schroeven van de LCD heen is geplakt.

    • Zorg dat je tijdens deze reparatie goed bijhoudt welke schroeven waar vandaan komen om zeker te weten dat je ze op de juiste positie terug plaatst. Zo voorkom je schade aan je toestel.

  34. t5OjLd3WOw55haH1
    t5OjLd3WOw55haH1
    NuH1Mku1dgriUOZw
    PAASAf3r4YYAtyOW
    • Probeer het LCD-scherm nog niet volledig te verwijderen aan het einde van deze stap, aangezien deze nog steeds aan de thuisknopkant van de iPad bevestigd is door meerdere kabels.

    • Til de LCD enkel vanaf de kant van de naar voren gerichte camera omhoog.

    • Gebruik het platte einde van je spudger om de LCD uit de inkeping in de iPad te tillen tot je deze met je vingers vast kunt pakken.

    • Klap de LCD als een boek open. Til de LCD vanaf de camera omhoog en gebruik de kant waar de thuisknop zit als het scharnier.

    • Leg de LCD op een schoon, pluisvrij oppervlak om toegang tot de schermkabels te krijgen.

    When flipping the LCD over be aware the the cable can be just short enough that when you flip it the tension caused can potentially cause damage if not carefully paid attention to. When LCD loosened from mounts, the bottom two corners can be left within the frame after you flip it.

    William Harwood -

  35. OHqXvYZRCZoeetDM
    OHqXvYZRCZoeetDM
    MfSOUYOSmKfKYySr
    • Gebruik een kruiskopschroevendraaier om de 2.3 mm lange schroef, waarmee de batterijaansluiting op het logic board is bevestigd, te verwijderen.

  36. jt4vWJnpj3gdTY4b
    jt4vWJnpj3gdTY4b
    iMJKm2GEMbPyKxCY
    5jJiilcK6uVuO6UG
    • Deze afbeeldingen laten zien hoe de batterijaansluiting onder het logic board eruit ziet. Gebruik deze afbeeldingen als referentie bij het veilig loskoppelen van de batterij.

    • Wees je ervan bewust dat de batterijaansluiting cantilever veren heeft die op het logic board zijn bevestigd en de contactkussens van de batterij raken. Aangezien zowel de batterij als het logic board zijn vastgelijmd, zul je iets dun en flexibels tussen de contactpunten moeten steken om de batterij los te kunnen koppelen.

  37. nsyt2uuWayDvnWSN
    nsyt2uuWayDvnWSN
    ABBJiqrXuKcEc1AL
    S5webgxEegkCKbUS
    • Wees voorzichtig bij het isoleren van de batterij met behulp van een batterijblocker. De batterijcontacten zijn kwetsbaar en dus makkelijk te breken of verbuigen, wat tot onherstelbare schade leidt.

    • Zorg dat het iFixit-logo op de batterijblocker naar boven wijst.

    • Schuif de batterijblocker in een hoek van ongeveer 35 graden onder de batterijaansluiting op het logic board.

    • Duw de batterijblocker niet met botte kracht onder de aansluiting. Als je moeite hebt met het op juiste wijze plaatsen van de batterijblocker kun je ook een speelkaart gebruiken om de batterij los te koppelen.

    • De batterijblocker of speelkaart zou gemakkelijk en zonder obstakels onder de batterijaansluiting moeten kunnen schuiven. Na het plaatsen zou je tool in een hoek van ongeveer 15 graden moeten staan.

    • Laat je batterijblocker op z'n plek zitten terwijl je verder werkt.

  38. MXWfQNMDmRonYjDU
    MXWfQNMDmRonYjDU
    dOn5Y1RuSWoL4QdM
    • Gebruik een kruiskopschroevendraaier om de drie 1.4 mm lange schroeven, waarmee de beugel van de schermkabel bevestigd is, te verwijderen.

  39. UlCmQJMnpKYMKikJ
    UlCmQJMnpKYMKikJ
    yMOZdTssB1MWKVTL
    • Verwijder de beugel van de schermkabel.

  40. QhlmQgZQE31VFCl5
    QhlmQgZQE31VFCl5
    jxTEr2F6FuWjOtEw
    • Gebruik het platte einde van je spudger om de drukaansluiting van de LCD-kabel in een rechte beweging omhoog te duwen en zo los te koppelen.

    • Om drukaansluitingen zoals deze weer aan te sluiten, breng je ze eerst op de juiste positie boven het contact aan en druk je vervolgens eerst de ene kant van de aansluiting en dan pas de andere kant naar beneden. Druk niet op het midden, want als de aansluiting verkeerd geplaatst is, riskeer je het contact permanent te beschadigen.

  41. VLaIW1hJHEqGLUak
    VLaIW1hJHEqGLUak
    CJyrorPwAjB3kvkI
    • Verwijder de LCD in z'n geheel en leg deze op z'n kop op een schoon, pluisvrij oppervlak.

  42. dBgHCbiwHw1WMWQf
    dBgHCbiwHw1WMWQf
    ntxnwIlQBB2Yco2O
    • Gebruik een pincet om de tape die over de ZIF-aansluiting van de thuisknopkabel heen is geplakt, los te trekken.

  43. w4eXX2BdWPHkxcYR
    w4eXX2BdWPHkxcYR
    vJ4GAR4ONBjjWxHG
    • Gebruik een spudger, een openingstool of een van je nagels op de kleine vergrendeling op de ZIF-aansluiting van de thuisknopkabel omhoog te klappen.

  44. CDBsVjWQNOmeZ3pH
    CDBsVjWQNOmeZ3pH
    DaP1reiBQRWBZboX
    • Gebruik een pincet om de lintkabel van de thuisknop in een rechte beweging uit het ZIF-contact weg te trekken.

  45. fRqjvfUDFpGwJEuM
    fRqjvfUDFpGwJEuM
    2cZUUmYT6MTjcxtl
    qqbJARxZIHM5nCan
    • Gebruik het platte einde van je spudger om de twee drukaansluitingen van de digitizer-kabel omhoog te wrikken en los te koppelen.

    • Om te voorkomen dat je je iPad beschadigt, wrik je enkel de aansluitingen zelf omhoog en niet het contact op het logic board.

  46. 2Z65nIi4uMCvttCN
    2Z65nIi4uMCvttCN
    OThHsnG4ttXrfCQE
    HaUpGcXp2GltHHjW
    • Gebruik het platte einde van je spudger om de trillingsisolator in de rechter benedenhoek van het toestel omhoog te wrikken.

    • Ga voorzichtig te werken en voorkom dat je de lintkabel van de thuisknop scheurt of beschadigt.

    • Verwijder de trillingsisolator.

  47. ogIaD6vOywWV4qFm
    ogIaD6vOywWV4qFm
    CF4xLynj23qvWZQO
    • De thuisknopkabel is met een lichte lijm vastgemaakt.

    • Gebruik een pincet om de thuisknopkabel van het frame weg te trekken.

  48. 6nVv2pTvXfQeJt5k
    6nVv2pTvXfQeJt5k
    edNM131pTfdaygtM
    NTLOVWWsXPM33GkA
    • Verwijder de voorste paneelmodule.

    • Gebruik een openingsplectrum om de overige lijm, die de voorste paneelmodule nog steeds aan het frame van de iPad bevestigt, door te snijden.

    • Als je bij je nieuwe scherm last hebt van "spook-" of "fantoom"aanrakingen kun je dit probleem verhelpen door een laag zeer dunne isolatietape, zoals Kapton (polyimide) tape aan te brengen op de gemarkeerde gebieden op het achterste paneel. iFixit-digitizers bevatten deze isolatie al, waardoor deze stap overbodig is.

    • Zonder de juiste isolatie kunnen deze gebieden van de digitizer contact maken met andere onderdelen, waardoor de touch-functies van je scherm niet goed zullen functioneren.

    • De isolatie is niet zichtbaar met het blote oog en is niet hetzelfde als de schuimstrips die je in veel iPad's vindt.

    • Zorg dat je, bij het weer in elkaar zetten van je toestel, eerst alle oude lijmresten uit de iPad verwijdert met wat isopropyl alcohol (>90%) en een pluisvrije doek voordat je je nieuwe scherm plaatst. Dit maakt je iPad klaar voor het plaatsen van nieuwe lijm en een goede hechting.

    • Test de functies van je iPad en bevestig vervolgens de vooraf op maat gesneden kleefstrips aan de achterkant van je scherm met behulp van onze handleiding voor het aanbrengen van kleefstrips.

  49. FwTuevcTaFyvHvb3
    FwTuevcTaFyvHvb3
    owRvUkXZcNvVIvX1
    • Gebruik een kruiskopschroevendraaier om de drie 1.4 mm lange schroeven, waarmee de bovenste beugel bevestigd is, te verwijderen.

  50. lbTfaUbRbVQlR4JI
    lbTfaUbRbVQlR4JI
    WXwdZkFd6sFMOZeK
    • Gebruik een pincet of je vingers en verwijder de bovenste beugel van het frame van de iPad.

  51. 1Ciw3OjuMh1kwWCQ
    1Ciw3OjuMh1kwWCQ
    CGPSdQrXAhOaQeJA
    • Gebruik het platte einde van je spudger om de drukaansluiting van de camerakabel omhoog te duwen en los te koppelen.

  52. KHXNH5VOGXdQA1Hr
    KHXNH5VOGXdQA1Hr
    cK3JjqFTg2tGCgNh
    • De behuizing van de voorste camera is lichtjes aan het frame bevestigd.

    • Steek een openingsplectrum tussen de behuizing van de voorste camera en het frame van het toestel.

  53. sN12CDTZtMclPcCB
    sN12CDTZtMclPcCB
    WEcZttf3OQ6X3YC2
    daNa4E5EWxRqesqY
    • Schuif je plectrum langs de buitenkant van de camerabehuizing om deze van de lijm eronder te scheiden.

  54. kh6OwZRnBuCxThNE
    kh6OwZRnBuCxThNE
    WGLGAwMTKZSb1Gpj
    VKRaGYRmp621PZcf
    • Wrik de camerabehuizing met behulp van je plectrum voorzichtig omhoog om deze van de lijm in het frame te scheiden.

    • Verwijder de voorste camerabehuizing.

  55. R2ooWxh6GqORBawB
    R2ooWxh6GqORBawB
    GsWWiWAXQNysMnfB
    eXCAxL2JNbYVZXYx
    • De voorste camera is door middel van lijm bovenop de microfoonmodule bevestigd.

    • Steek een spudger tussen de voorste camera en de microfoonmodule.

    • Wrik de voorste camera omhoog om deze van de module eronder te scheiden.

    • Verwijder de voorste camera.

  56. neHvyxxnGAoTBiJ3
    neHvyxxnGAoTBiJ3
    JvEjNKScQl5F2UYA
    • Gebruik het platte einde van je spudger om de drukaansluiting van de audio-jack in een rechte beweging omhoog te duwen en zo los te koppelen.

  57. 2YjNvaciWfbkfGr3
    2YjNvaciWfbkfGr3
    wc5HL2VaSHWwXdIu
    UuuNXVIlB6SANWRa
    • Gebruik je vingers om de audio-jackaansluiting van het frame af te peuteren en de kabel uit de weg te halen.

  58. cK3pCwYev6FcIidU
    cK3pCwYev6FcIidU
    DCmOlPD5n1RsXLHl
    • Gebruik het platte einde van je spudger om de drukaansluiting van de achterste camera in een rechte beweging omhoog te duwen en los te koppelen.

  59. qstmSJusJHA6nAHS
    qstmSJusJHA6nAHS
    ESrpIU6PYfQUEXJM
    • Gebruik het platte einde van je spudger om de drukaansluiting van de microfoonmodule in een rechte beweging omhoog te duwen en los te koppelen.

  60. NRUw5eKMJUsgZ2FC
    NRUw5eKMJUsgZ2FC
    CMOTS1U1KqFmDwhH
  61. xAIBQLmgRgNWinJS
    xAIBQLmgRgNWinJS
    HbhEkeNamgdoplQS
    • Gebruik de punt van je spudger, een openingstool of een van je nagels om de kleine vergrendeling op de ZIF-aansluiting van de knoppencontrolekabel omhoog te duwen.

  62. EjmTLJCGgsjQyWrb
    EjmTLJCGgsjQyWrb
    UAJ5FbVL4NLH4VK4
    • Gebruik een pincet om de knoppencontrolekabel in een rechte beweging uit de ZIF-aansluiting weg te trekken.

  63. KEBFrwXLf142kagu
    KEBFrwXLf142kagu
    FnVgNasZPedOrbGK
    • Trek de tape, die over de ZIF-aansluiting van de Smart Cover-sensorkabel is geplaatst, los.

  64. KGEInNudAMnJwjYI
    KGEInNudAMnJwjYI
    3iIehOEAXWOvHSOG
    • Gebruik de punt van een spudger, een openingstool of een van je nagels om de kleine vergrendeling op de ZIF-aansluiting van de Smart Cover-sensorkabel omhoog te klappen.

  65. o1Hc5vOIMGlopwek
    o1Hc5vOIMGlopwek
    Wgiu2uROEmPe5TFU
    • Gebruik een pincet om de sensorkabel van de Smart Cover in een rechte beweging uit het ZIF-contact weg te trekken.

  66. gSwYNdm3bFmhk4lV
    gSwYNdm3bFmhk4lV
    GRM4ADg2LAHDpQjs
    4SdMlNNPCLBNvLwj
    • Gebruik de punt van een spudger om de coaxiale kabel van de linker antenne omhoog te duwen en los te koppelen.

    • Herhaal deze stap voor de coax-kabel van de rechter antenne.

    • Deze kabels kunnen bij het weer in elkaar zetten van je toestel lastig te bevestigen zijn. Houd de aansluitingen boven het contact en druk deze met het platte deel van je spudger naar beneden. De aansluiting zou dan vast moeten klikken.

  67. GnCZlXJVKYv4vAeC
    GnCZlXJVKYv4vAeC
    uOgLB4yMthZI6MgZ
    • Trek de rechter antennekabel voorzichtig omhoog.

    • Pak de antennekabel bij de kabel zelf vast en niet bij de aansluiting. Dit kan tot schade van de coax-kabels leiden.

  68. p2v3MFn4wMM6meJI
    p2v3MFn4wMM6meJI
    HGIKRYOTlyXobYEE
    wsDAOmxXehZQKMFP
    • Trek de linker antennekabel voorzichtig langs de onderkant van de iPad van het frame weg.

  69. OaaukrpENlEua2BC
    OaaukrpENlEua2BC
    HafKbFDQlPYxJuur
    vG5Ju2JBPSGWmCIT
    • Gebruik het platte einde van je spudger om de trilisolator in de linker benedenhoek van de iPad omhoog te wrikken.

    • Gebruik een pincet om de trilisolator te verwijderen.

  70. JxdU6TUbHYEPjRt6
    JxdU6TUbHYEPjRt6
    dUgFgARLGMj12Bs3
    r34BjHf6uQYuUKUL
    • Gebruik een pincet of je vingers om de tape die over de speakeraansluitingen heen is geplakt te verwijderen.

  71. 4fDyHMXSVfkE2RWK
    4fDyHMXSVfkE2RWK
    AhZ2OhXAxcYKVhwU
    PYT5KfuRecimYpJN
    • Gebruik de punt van je spudger, een openingstool of een van je nagels om de kleine vergrendeling op de ZIF-aansluiting van zowel de linker als de rechter speakerkabel omhoog te klappen.

  72. IDmaGkIic5ZGGFEy
    IDmaGkIic5ZGGFEy
    gWvJ3MXfIXoZUXXV
    didiWXWvHOCtxYNE
    • Gebruik een pincet om de linker en rechter speakerkabel op voorzichtige wijze uit hun respectievelijke contacten weg te trekken.

  73. QQYJBX2INAVbDgmI
    QQYJBX2INAVbDgmI
    XddxrfFDqF2nKJJp
    • Gebruik de punt van je spudger om de coaxiale kabel van de Smart Connector los te koppelen. Dit doe je door de kabel zo dicht mogelijk bij de aanluiting omhoog te wrikken.

  74. CnSJjSKJRNEF5v4I
    CnSJjSKJRNEF5v4I
    tGIwsjClVUwkVh4W
    • Gebruik een spudger om de kabelaansluiting van de Smart Connector omhoog te wrikken en los te koppelen.

  75. fYOpys6GGLhGdZXp
    fYOpys6GGLhGdZXp
    PwXwkFvPwLf1xbdF
    • Gebruik een pincet om de tape, die de kabels van de Smart Connector aan het frame bevestigt, weg te trekken.

  76. BIolYAIcJSieMk3v
    BIolYAIcJSieMk3v
    2JEJLP4JoVNCKlrT
    DoWPudCXODyCbqZa
    • Trek de kabels van de Smart Connector van het frame weg.

  77. sfawXGV66i4aFwTB
    sfawXGV66i4aFwTB
    dEFsfEuASnb1PdWA
    • Gebruik een kruiskopschroevendraaier om de vier schroeven, waarmee de oplaadpoort aan het frame bevestigd is, te verwijderen:

    • Twee 2.2 mm lange schroeven

    • Twee 3.2 mm lange schroeven

  78. oqg4migKLfYmFApm
    oqg4migKLfYmFApm
    1gqtG1Ym52p1TrKM
    aSJvJq5wauYVoMbO
    • Verwarm een iOpener en leg deze gedurende dertig seconden op zowel de onder-, boven- en logic board-kant van de iPad.

  79. IZRoHGmyvLtbcAA6
    IZRoHGmyvLtbcAA6
    1ECnYGXPnQkuDk6a
    • Steek een openingsplectrum, in de buurt van het logic board, onder de kabel van de oplaadpoort en schuif deze richting de oplaadpoort om de lijm door te snijden.

  80. XQviOTbTjYxypJCO
    XQviOTbTjYxypJCO
    DkdNcCMnT3plbRWS
    EQjTZUCaZMriqooq
    • Steek een openingsplectrum, in de buurt van de oplaadpoort, onder de kabel van de oplaadpoort en schuif deze richting het logic board om de lijm eronder door te snijden.

    There are two screws on the front of the charging port (not above it) that have to be reomoved on ipad 7 Model A2197 before you can pull the charging port out of it's slot in the frame as instructed.

    echildress -

  81. bpTn1dYHNxA4bRhF
    bpTn1dYHNxA4bRhF
    QnpenrIfAa161jgB
    • Trek de oplaadpoort uit de sleuf in het frame.

  82. uVCF6HZfEOOkqGH3
    uVCF6HZfEOOkqGH3
    XMWiUu4cq1Q1Olaq
    1agsJTCvnwDH5VcN
    • Steek een openingsplectrum onder de bovenste arm van het logic board en schuif deze richting het logic board om de lijm eronder door te snijden.

    • Laat je plectrum op z'n plek zitten om te voorkomen dat de lijm zich opnieuw aan het frame gaat hechten.

  83. DCxTqPqYHkQJqs1R
    DCxTqPqYHkQJqs1R
    v6HFPPIatJyOFcBH
    • Verwijder de batterijblokker.

  84. 4S2OkjQGINPIf4NK
    4S2OkjQGINPIf4NK
    HECBgeBGkBc6UUHt
    • Steek een openingstool ter hoogte van het midden van het logic board onder het logic board en wrik deze met een langzame en constante kracht omhoog om het bord van het frame te scheiden.

    • Het verbuigen of vervormen van het logic board kan tot permanente schade leiden. Als het voelt alsof de lijm extra sterk is, gebruik je meer warmte om de lijm te verzwakken en probeer je het nog eens.

    • Als het logic board niet los wil komen, schuif je een openingsplectrum onder de onderkant van het logic board om wat van de lijm door te snijden.

  85. nws1wqSbQ1fadbM4
    nws1wqSbQ1fadbM4
    GxO6kS35UA4PpYPa
    • Gebruik een spudger of een openingsplectrum om de lijm die het logic board nog aan het frame houdt door te snijden.

  86. BkNeLH21oitXLMqt
    BkNeLH21oitXLMqt
    XsdwPY2hGkcN6qvo
    • Verwijder het logic board.

    • Zorg dat je bij het weer in elkaar zetten van je toestel dubbel-checkt of er geen lintkabels onder het logic board vast zijn komen te zitten voordat je het logic board weer met lijm bevestigt.

    • Als de originele, oude lijm niet meer gebruikt kan worden om het logic board terug te plaatsen, kun je bij het weer in elkaar zetten van je toestel gebruik maken van Tesa-tape.

  87. tvOGCMEsO2yTMxUR
    tvOGCMEsO2yTMxUR
    JWxousBION5C5Xiv
    SGxThe3abwXawM1G
    • Zorg dat je, voordat je de batterij verwijdert, eerst alle andere onderdelen in de achterste behuizing beschermt door ze te beplakken met tape.

    • Knip een stuk schilders- of een andere soort tape af dat net zo breed is als de iPad.

    • Druk de onderkant van het stuk tape op de achterste behuizing, net boven de speakers en onderste antennes.

    • Laat je vinger over de tape glijden om de tape aan te drukken.

    • Plak de bovenkant van het stuk tape over de onderste onderdelen om de kabels weg te houden bij het verwijderen van de batterij.

  88. ZE6G1gv3Alt6PNB3
    ZE6G1gv3Alt6PNB3
    fKsOSSMlujOdhTOf
    • Bedek ook de bovenste onderdelen met een stuk tape.

  89. p3kUPGufZOejLTAD
    p3kUPGufZOejLTAD
    ysEcgZFFoawjMfFp
    • De iFixit-lijmverwijderaar bevat aceton, een vloeistof die je ogen en huid aan kan tasten.

    • Draag oogbescherming bij het gebruiken en toedienen van de lijmverwijderaar.

    • Draag geen contactlenzen zonder oogbescherming.

    • Er zitten handschoenen in de kit. Als je je zorgen maakt over mogelijke beschadiging van je huid kun je deze nu aantrekken.

  90. s4KOTvGhcswC6SMA
    s4KOTvGhcswC6SMA
    3BOtb6afmcaEdpcH
    E44FACGJOgsN5CNa
    • Trek de zwarte rubberen dop van het flesje met lijmverwijderaar af.

    • Draai de dop van het flesje af voordat je de punt van het flesje afknipt.

    • Dit opent het flesje, waardoor de druk zich kan verdelen voordat je de punt van het flesje knipt. Als je deze stap overslaat, kan de vloeistof uit het flesje spuiten bij het openknippen van de dop.

    • Gebruik een schaar om de verzegelde punt van de dop af te knippen.

    • Hoe dichter je bij de punt van het flesje knipt, des te meer controle zul je hebben bij het toedienen van de vloeistof.

    • Draai de dop weer op het flesje voordat je verder gaat.

  91. Ie2rRpC2EhCTgO1h
    Ie2rRpC2EhCTgO1h
    KFGUWE4Fq2QEJIxg
    • De rode markeringen tonen de locaties van de kleefstrips die de batterij in de achterste behuizing bevestigen.

    If folks have a 3D printer with a heated bed (which is pretty common), putting the iPad on a 60 degree C bed for a few minutes really helps loosen up the glue with the alcohol. Worked for me this time around.

    Ed Leonhardt -

  92. XOmbaQRX6HUqdvps
    XOmbaQRX6HUqdvps
    lBV5dqJwJMhxgpYX
    ARrUSayxGCu2JPi5
    • Dien een aantal druppels lijmverwijderaar of hoog geconcentreerde isopropyl alcohol toe langs de linkerzijde van de batterij.

  93. SSKn3aVwOXHadGpJ
    SSKn3aVwOXHadGpJ
    e6Lv1yYuNMEWggUO
    • Dien een aantal druppels lijmverwijderaar of hoog geconcentreerde isopropyl alcohol toe langs de onderkant van de batterij.

  94. BOjMtSIKPaOyMlXd
    BOjMtSIKPaOyMlXd
    YTFUAowom1CJUqlu
    • Dien een aantal druppels lijmverwijderaar of hoog geconcentreerde isopropyl alcohol toe tussen de twee batterijcellen.

  95. dlsuNB4q5FKdfGCB
    dlsuNB4q5FKdfGCB
    LgIFxY1B4ZjWTHAf
    • Dien een aantal druppels lijmverwijderaar of hoog geconcentreerde isopropyl alcohol toe langs de rechterzijde van de batterij.

  96. CfC2sOC4KQHYbXdr
    CfC2sOC4KQHYbXdr
    iNIYadJ3SPTXltwq
    • Dien een aantal druppels lijmverwijderaar of hoog geconcentreerde isopropyl alcohol toe langs de bovenkant van de batterij.

  97. CQ6H1knjpWrGQTJT
    CQ6H1knjpWrGQTJT
    TjIxZXIUCVRd31ME
    • Steek een plastic kaart onder de rechter benedenhoek van de batterij.

    • Wees voorzichtig en voorkom dat je je batterij met je tool verbuigt of doorboort. Een verbogen of doorboorde batterij kan gevaarlijke chemicaliën lekken of een brand of explosie veroorzaken.

    • Als de lijm ergens in het proces te hard is om door te kunnen snijden, kun je ervoor kiezen een iOpener op de plek te gebruiken om de lijm te verzwakken.

  98. P4oCmHwDVIQQMBWV
    P4oCmHwDVIQQMBWV
    nMGTl6g61josNmyR
    gpjFFF2rwUkKAEbc
    • Schuif je plastic kaart onder de rechterzijde van de batterij om het midden te kunnen bereiken.

    • Schuif je plastic kaart zo ver als je kunt onder de batterij om de lijm eronder door te snijden.

    • Verwijder je plastic kaart.

  99. F5DZG5jlPLyBplLO
    F5DZG5jlPLyBplLO
    DDWNqeLFakQcQBLA
    • Schuif je plastic kaart nu onder de batterijaansluiting onder de batterij en duw deze zo ver als mogelijk is.

    • Laat je plastic kaart onder de batterij zitten.

  100. omEDtUZJ2EdYxSRW
    omEDtUZJ2EdYxSRW
    rwKlW22akeFesCQS
    • Steek nog een plastic kaart zo ver mogelijk onder de batterij, deze keer net boven de batterijaansluiting.

  101. Fdgj5bQjSKmtdyy4
    Fdgj5bQjSKmtdyy4
    pqoXVthwnsFaZANd
    • Verwijder de plastic kaart die je net onder de batterijaansluiting hebt geplaatst en verplaats deze naar de onderkant van de batterij.

  102. OeLJwbY5bpFoBeIs
    OeLJwbY5bpFoBeIs
    sGfkRislCvDycRhT
    Y4IZVRXWtFROm5Wq
    • Schuif de plastic kaart langs de onderkant van de batterij om de lijm aldaar door te snijden.

    • Steek de plastic kaart, bij het bereiken van de linker benedenhoek, zo ver mogelijk onder de batterij.

  103. ab2gasUW5XMEBwW6
    ab2gasUW5XMEBwW6
    eEhcrCXhrLFCWrGf
    • Verwijder de plastic kaart die je net boven de batterijaansluiting hebt geplaatst en verplaats deze naar de bovenkant van de batterij.

    • Schuif je plastic kaart langs de bovenkant van de batterij om de lijm daar door te snijden.

    • Als je moeite hebt met het doorsnijden van de lijm dien je wat meer lijmverwijderaar toe of leg je een verwarmde iOpener op de achterste behuizing.

  104. OuXNnLlgXdNor1qF
    OuXNnLlgXdNor1qF
    NEBcKCQ6uWRENDHX
    • Steek de plastic kaart, bij het bereikenv an de linker bovenhoek, zo ver mogelijk onder de batterij.

  105. NWyqaIsyVVk2c6Lm
    NWyqaIsyVVk2c6Lm
    xCuVSl5eHkYlrIS2
    MExlCnMecFaGCLiV
    • Steek je plastic kaart bij de linker bovenhoek van de batterij onder de batterij.

    • Schuif je plastic kaart richting de onderkant van de iPad.

    • Steek je plastic kaart, bij het bereiken van het midden van de batterij, zo ver mogelijk onder de batterij om de lijm van de middelste kleefstrip door te snijden.

  106. wOt6XdnZWKY4lwJn
    wOt6XdnZWKY4lwJn
    fZbdnffLW3vF1YAi
    • Steek je plastic kaart bij de linker benedenhoek van de iPad onder de batterij.

    • Schuif je plastic kaart naar de bovenkant van de iPad.

  107. DcGmEwmBPxvE3Tgr
    DcGmEwmBPxvE3Tgr
    DTfDJddPE6UIkAYA
    • Steek je plastic kaart, bij het bereiken van het midden, zo ver mogelijk onder de batterij om de lijm van de middelste kleefstrip door te snijden.

  108. bEdBhRf1BF4X5fgA
    • Verwijder de batterij.

    • Als het nog steeds niet lukt de batterij te verwijderen, herhaal je de stappen waarin je de lijm onder de batterij probeert door te snijden.

    • Hergebruik nooit een verwijderde batterij, aangezien dit altijd een potentieel gevaar met zich meebrengt. Vervang deze altijd door een nieuwe batterij.

    • Verwijder de oude kleefstrips uit de achterste behuizing met behulp van een pincet, hoog geconcentreerde isopropyl alcohol en een pluisvrije doek.

    • Als je batterij geen vooraf bevestigde kleefstrips wordt aangeleverd, kun je een stuk Tesa-tape gebruiken om de batterij weer in de achterste behuizing te bevestigen.

    • Test je nieuwe batterij, voordat je deze installeert: steek eerst het logic board terug, sluit vervolgens de ZIF-aansluiting van de knoppencontrolekabel en de LCD-drukaansluiting aan. Verwijder dan de batterijblocker, bevestig de schroef van de batterijaansluiting en zet je toestel aan. Dan volg je deze stap omgekeerd en lijm je je batterij vast.

Conclusie

Volg bovenstaande instructies in omgekeerde volgorde om je toestel weer in elkaar te zetten.

Kalibreer je nieuwe batterij na het voltooien van deze handleiding om te zorgen dat je batterij optimaal kan functioneren.

Breng je e-afval naar een door R2 of e-Stewards gecertificeerd recycle-station.

Ging je reparatie niet zoals gepland? Bezoek dan onze algemene probleemoplossingspagina of stel je vraag op ons iPad 7-antwoordenforum voor hulp bij het oplossen van je probleem.

Alex Diaz-Kokaisl

Lid sinds: 16/01/22

169220 Reputatie

Een commentaar

amazing this tutorial is a life safer i hoped the pictures was GIF

سلام -