Inleiding
Vooraf vereiste handleiding voor het vervangen van de schermmodule van een iPhone 6s Plus.
-
-
Schakel je iPhone uit voordat je begint deze uit elkaar te halen.
-
Verwijder de twee 3.4 mm lange Pentalobe schroeven aan beide kanten van de Lightning-poort.
-
-
-
Het is een optie om de onderkant van de iPhone gedurende een minuut te verwarmen met het gebruik van een iOpener of een föhn.
-
-
-
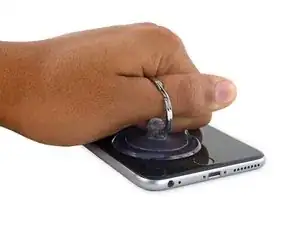
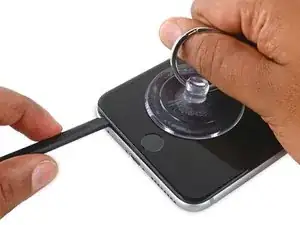
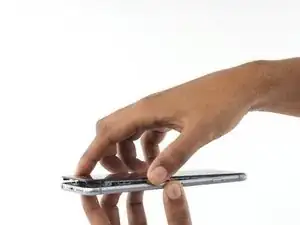
Trek de zuignap omhoog met een stevige, constante kracht om zo een kleine opening tussen het voorste paneel en de achterste behuizing te creëren.
-
-
-
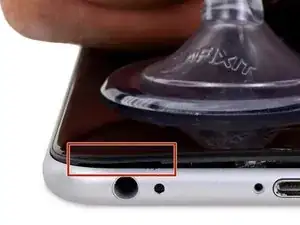
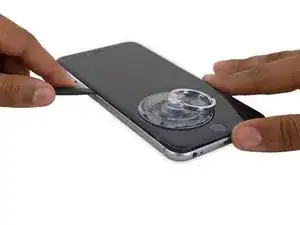
De beste en meest veilige plek om te wrikken is de inkeping in het voorste paneel, net boven de hoofdtelefoonjack.
-
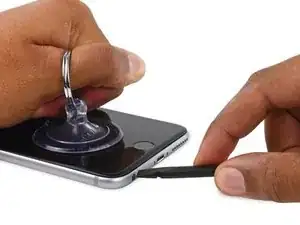
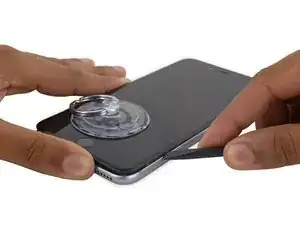
Steek het platte einde van een spudger, terwijl je druk op de zuignap houdt, in de gecreëerde opening, direct boven de hoofdtelefoonjack.
-
-
-
Kantel je spudger lichtjes terwijl deze in de opening zit om zo de opening tussen de schermmodule en de rest van de telefoon te vergroten.
-
-
-
Schuif de zijkant van de spudger, terwijl je stevig aan de zuignap trekt, onder de linker onderhoek van het scherm.
-
-
-
Schuif de punt van je spudger langs de linkerkant van de telefoon omhoog, tussen de schermmodule en de achterste behuizing.
-
-
-
Steek het platte einde van je spudger onder de rechterkant van het scherm.
-
Schuif de spudger langs de rechterzijde omhoog.
-
-
-
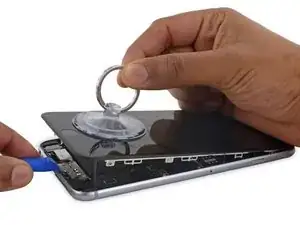
Gebruik een plasticen openingstool om de achterste behuizing vast te houden terwijl je de zuignap naar boven trekt om de telefoon te openen.
-
-
-
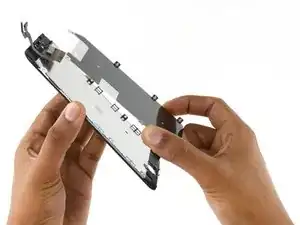
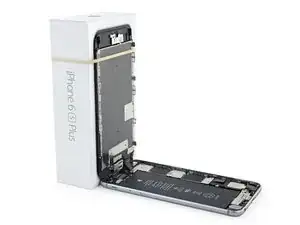
Pak de schermmodule voorzichtig vast en til deze op om de telefoon te openen. Gebruik de klemmen aan de bovenkant van het scherm als een scharnier om de telefoon te openen.
-
Open het scherm totdat deze ongeveer een hoek van 90º beschrijft en laat het scherm vervolgens leunen op een voorwerp, zodat je aan de telefoon kunt werken.
-
Je kunt bijvoorbeeld een elastiek gebruiken om de schermmodule te verbinden aan een voorwerp, waardoor deze rechtop blijft staan. Dit voorkomt ook dat je de kabels onbedoeld en te veel belast.
-
-
-
Verwijder de twee Phillips schroeven die het plaatje op de batterijaansluiting aan het logic board bevestigen, met de volgende lengtes:
-
Eén 2.9 mm lange schroef
-
Eén 2.3 mm lange schroef
-
-
-
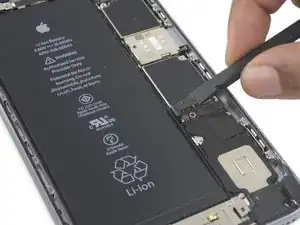
Gebruik de punt van een spudger om de batterijaansluiting los te koppelen door deze in een rechte beweging omhoog te duwen van het logic board.
-
-
-
Duw de batterijaansluiting weg van het contact om zo te voorkomen dat deze tijdens de reparatie per ongeluk contact maakt en de telefoon mogelijk inschakelt.
-
-
-
Verwijder de volgende Phillips schroeven:
-
Drie 1.3 mm lange schroeven
-
Eén 1.6 mm lange schroef
-
Eén 3.0 mm lange schroef
-
-
-
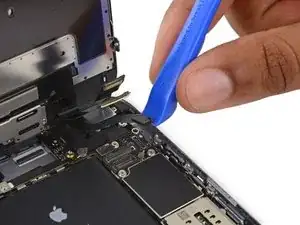
Gebruik een plasticen openingstool om de naar voren gerichte camera en de sensorkabelaansluiting los te koppelen.
-
-
-
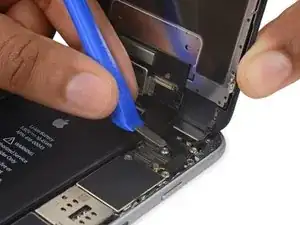
Gebruik een plasticen openingstool om de digitizerkabel los te koppelen door ook deze in een rechte beweging uit het contact op het logic board omhoog te duwen.
-
-
-
Koppel de thuisknop/vingerafdruksensorkabel los door deze in een rechte beweging uit het contact op het logic board omhoog te duwen.
-
-
-
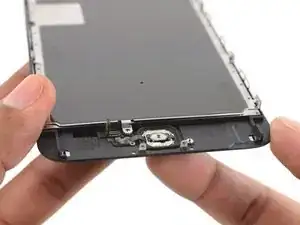
Verwijder de twee 1.9 mm lange Phillips schroeven die het plaatje over de thuisknop bevestigen.
-
-
-
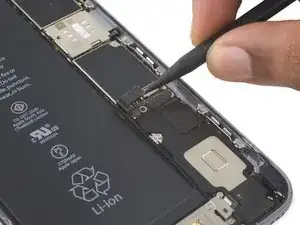
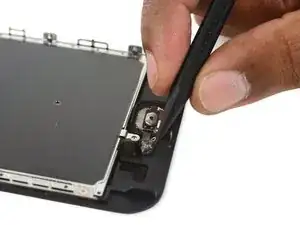
Gebruik de punt van je spudger om de thuisknopkabel los te koppelen van de aansluiting op de schermmodule.
-
-
-
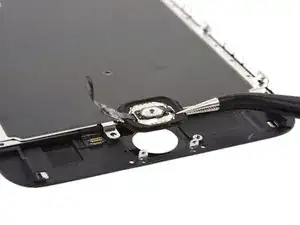
Dien wat warmte toe (met een iOpener, warmtepistool of een föhn) om de lijm die de pakking van de thuisknop bevestigt, te verzachten.
-
Druk, met behulp van je vingertopje, voorzichtig op de thuisknop vanaf de voorkant van de schermmodule. Gebruik een stevige, constante druk om de rubberen pakking van de thuisknop los te duwen van het voorste paneel en zo de thuisknop los te maken.
-
-
-
Gebruik de punt van een spudger om de licht vastgemaakte flexkabel van de thuisknop van de schermmodule los te wrikken.
-
-
-
Verwijder de volgende drie Phillips schroeven:
-
Twee 2.7 mm lange schroeven
-
Eén 1.4 mm lange schroef
-
-
-
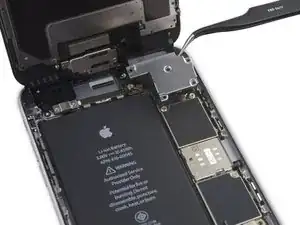
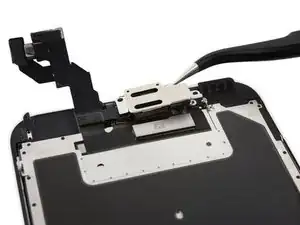
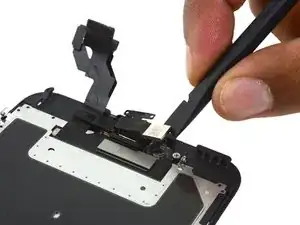
Gebruik de punt van een spudger om de omgevingslichtsensor uit haar behuizing in het voorste paneel te tillen.
-
-
-
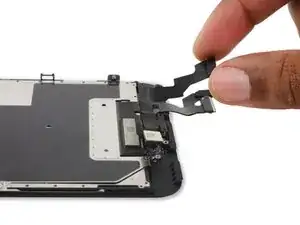
Steek de punt van je spudger tussen de flexkabel van de microfoon en het voorste paneel om de lijm die zich daar bevindt door te snijden.
-
-
-
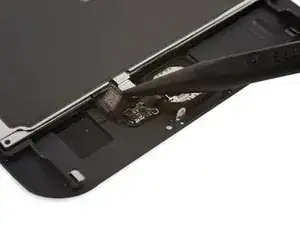
Gebruik het platte einde van een spudger om de microfoon en de pakking van het oorstuk omhoog te tillen.
-


Om je toestel weer in elkaar te zetten, volg je deze instructies in omgekeerde volgorde.

Make sure you use the correct screw driver tip to remove these screws, which for the iPhone 6s Plus is the P2, otherwise you may strip the tip of the screw making it 10 times harder to remove. If once the screw is lose, it will not come off, use a magnet to remove it.
Miguel Perez -
If I do it by myself, will it damage the water resistant strip?
I know iphone 7 have it ,but I am not sure 6s plus have it.
Ganqian Zhu -
iPhone 6s has an adhesive gasket under the display, similar to the iPhone 7—however, it doesn’t add much in the way of waterproofing since the 6s has non-sealed openings in other parts of the phone. Water resistance on the 6s is primarily internal (seals around the logic board connectors, etc.). It may still be worthwhile to replace the adhesive on the 6s in order to help keep the display firmly seated so it doesn’t move/wobble at all under pressure, but the phone will continue to work fine whether you replace the adhesive or not.
Jeff Suovanen -
Salve nella procedura iniziale di smontaggio display con la ventosa non è menzionato il fatto di scaldare i lati del display per “ammorbidire” la striscia che incolla il display alla scocca.
Non è necessaria la cosa o è consigliabile ?
grazie
Hello, in the initial disassembling procedure with the suction cup, it is not mentioned how to heat the sides of the display to "soften" the strip that glues the display to the body.
Is not the thing necessary or is it advisable?
thank you
Daniele -
You’ve probably received your answer by now but for future enquirers, it does help the process of taking the screen off if heat is applied to the screen. If you have a hair Dryer use that on a low setting to heat the edges of the screen until it’s almost too hot to touch then slip very thin metal spudger around the edge to cut the adhesive. The carefully lift the screen with the help of the spudger and continue with your repair
Cheers Wayne
Wayne Lyell -
How do I know that the Battery has ZERO Charging Cycles on it when it arrives ? Is there a (downside) to Higher Capacity batteries ? It is INCREDIBLY DIFFICULT to maintain a “Zero Chinese Products Lifestyle”, so how do I know that I’m not getting a deficient Chinese battery, potentially a refurb. battery ?
integritybuilders -
When your repair is complete, you can use coconutBattery to check your new battery stats and cycle count. (A properly tested battery may already have a charge cycle or two on it.) Avoid higher capacity batteries on iPhones—they’re generally either gimmicks, unsafe, or both. As far as the quality of the part, that comes down to how much you trust your supplier and whether they guarantee the product.
Jeff Suovanen -
So I need to empty the battery to zero percent?
johnpatrickanat -
Below 25%, exactly as stated in the instructions. There’s no benefit to draining it further than that, and in fact you’ll slightly shorten the service life of the battery by draining it all the way to zero. Follow the instructions exactly as written—if you go off-script, you’re a lot more likely to break something.
Jeff Suovanen -
So my screen shattered completely and the screen first had colored lines on tge while right side then it went out completely. If i get an lcd and digitizer replacement I'd that oing to fix it
shellietheleo -
I would initially recommend a well-lit, comfortable area and placing the screws on a white piece of paper with the screw sizes written down (apparently there are magnetic mats, also). Also, I found placing the phone on a paper towel is good so that if a screw is dropped, it will lessen the likelihood of bouncing away.
Lou Fazio -
I recommend that, before you even lift a screwdriver or plug in the hair dryer, get a piece of paper and a pencil. As you unscrew and remove the parts, write the size and/or number for that step and put them by their label. I also used a microscope to identify the screw heads (I'm 75 and my vision is not what it used to be). Laying them out in order, I just went backwards when putting them all back in. I used an anti-static cleaning cloth instead of paper, but I should think they both will work.
N.B.: my kit had a nice pretty blue plastic sheet with a black outline on it. It was only when I put the whole phone back together and was packing up the supplies and tools that I realized it was a replacement gummi seal. A LABEL WOULD BE VERY USEFUL HERE!
I am a retired engineer, and aside from the size of the bits and bobs, it was a piece of cake! Thanks...you saved me $75!
P. Roberts -